The Workshop Loading (WSL) module is designed to help you effectively manage technician workloads, schedule jobs, and track workshop capacity across your sites. This module is only applicable to workshop and R&M accounts.
This guide will walk you through using the Workshop Loading (WSL) module. This includes configuring key settings like technician roles, workshop opening times, shift patterns, and job allocation tools. You’ll learn how to visually manage your schedule with drag-and-drop functionality, filter job lists, assign tasks based on technician type, and monitor overall workshop load in real time. Whether you’re working with mobile technicians or multiple workshops, WSL helps streamline the process and keep your team moving efficiently.
Step by Step
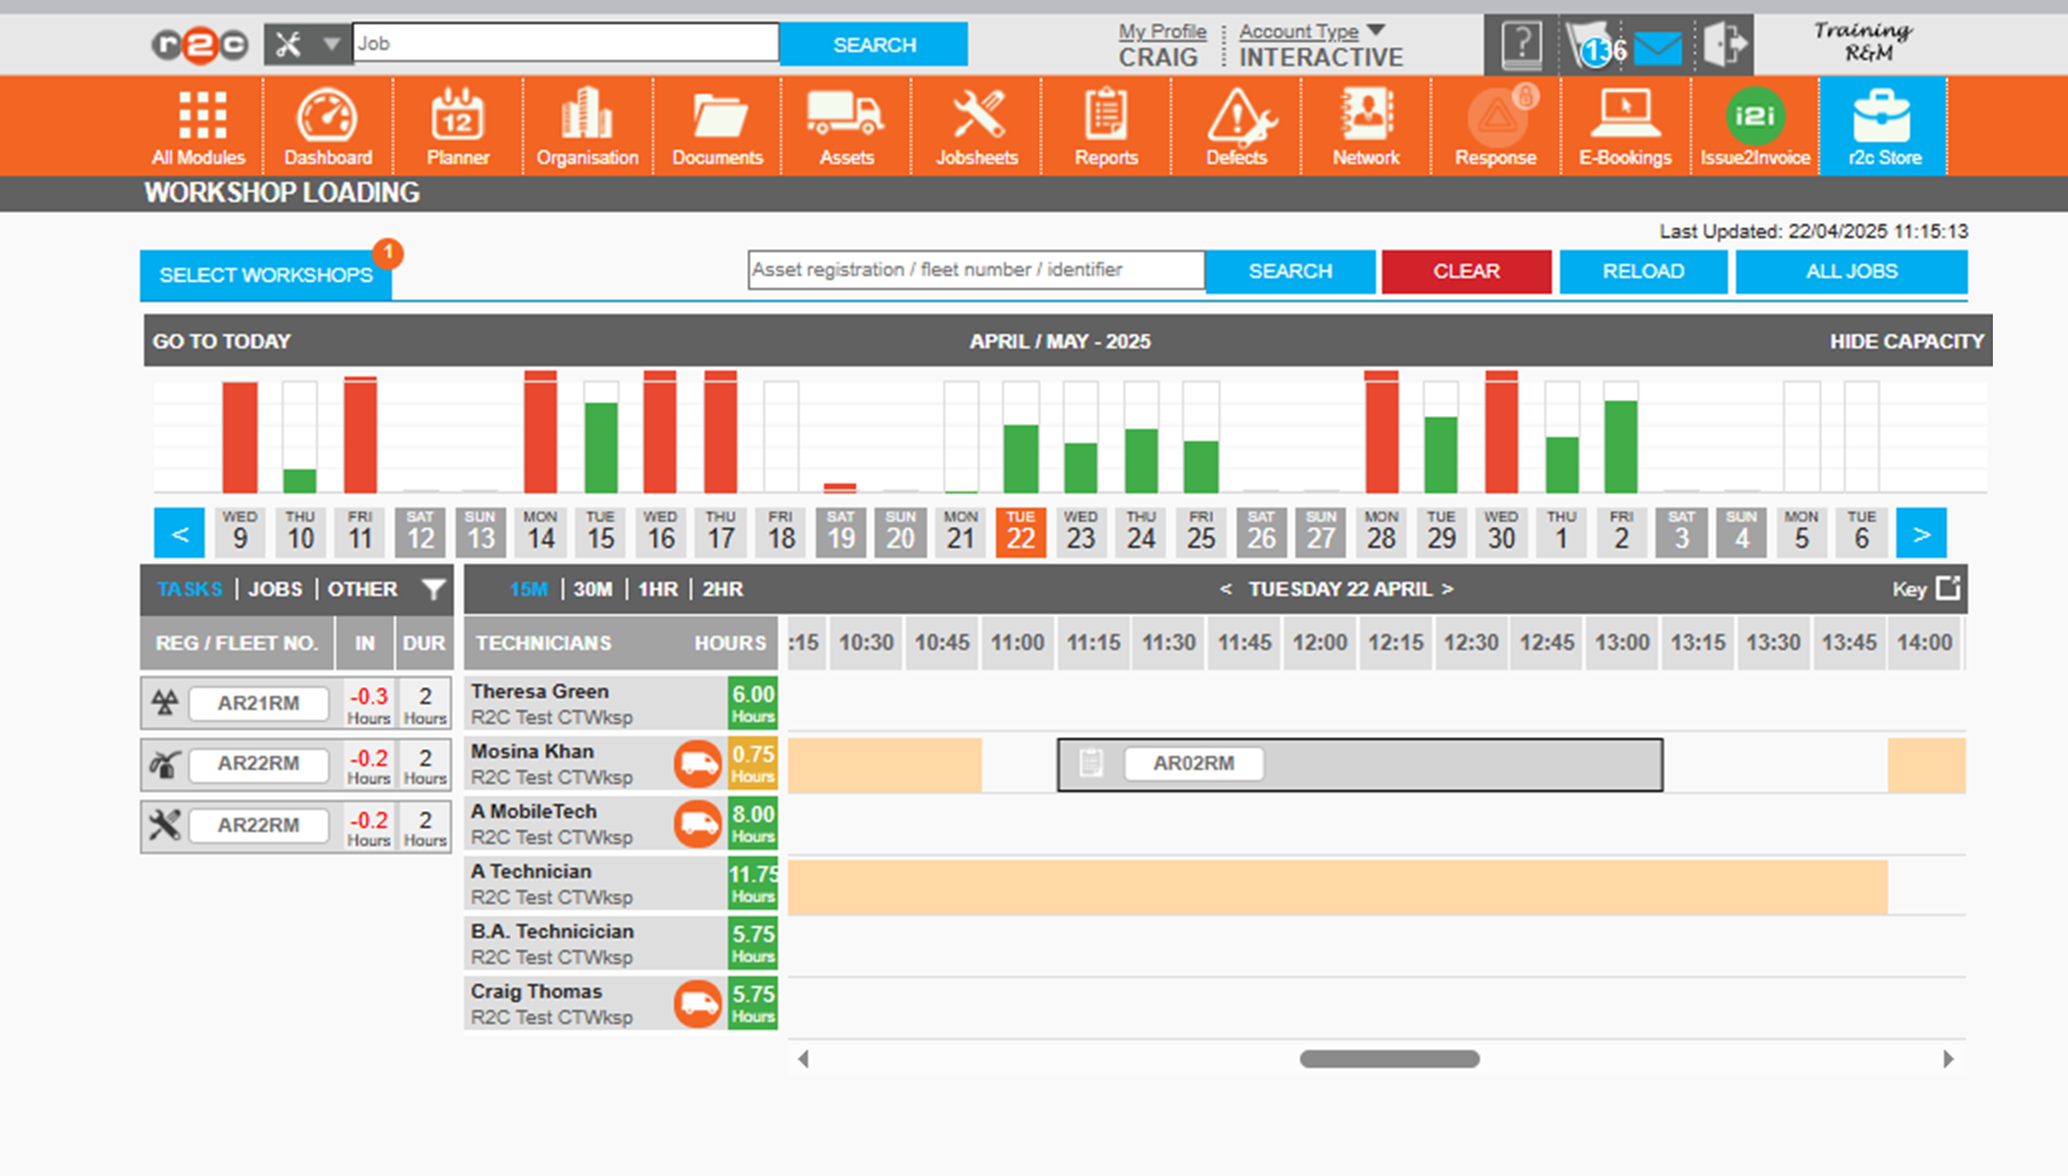
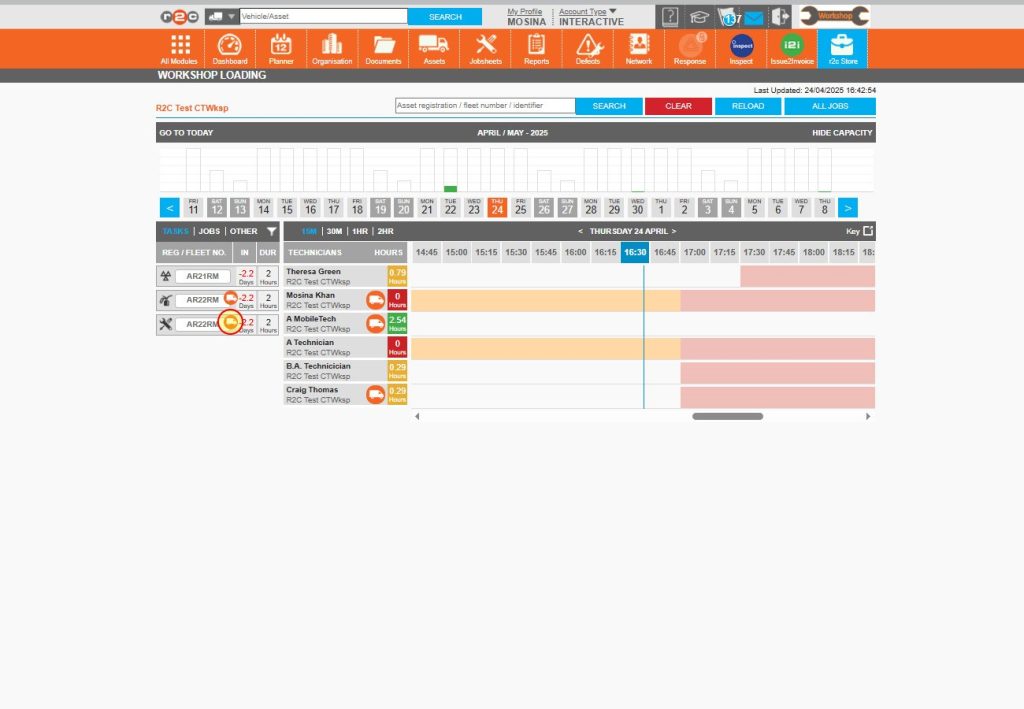
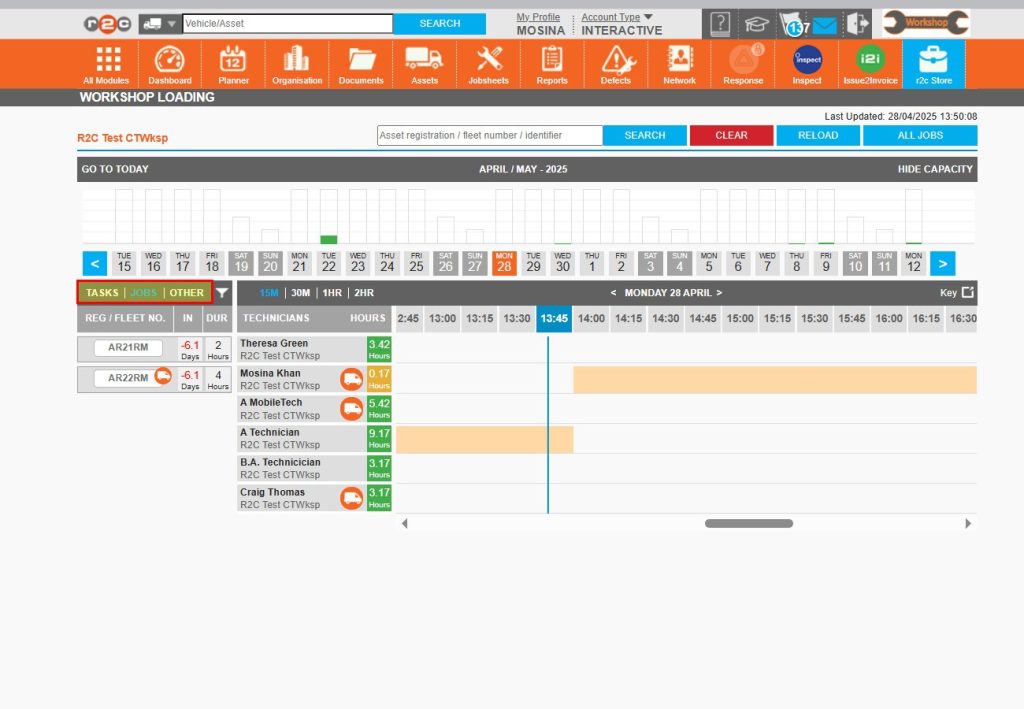
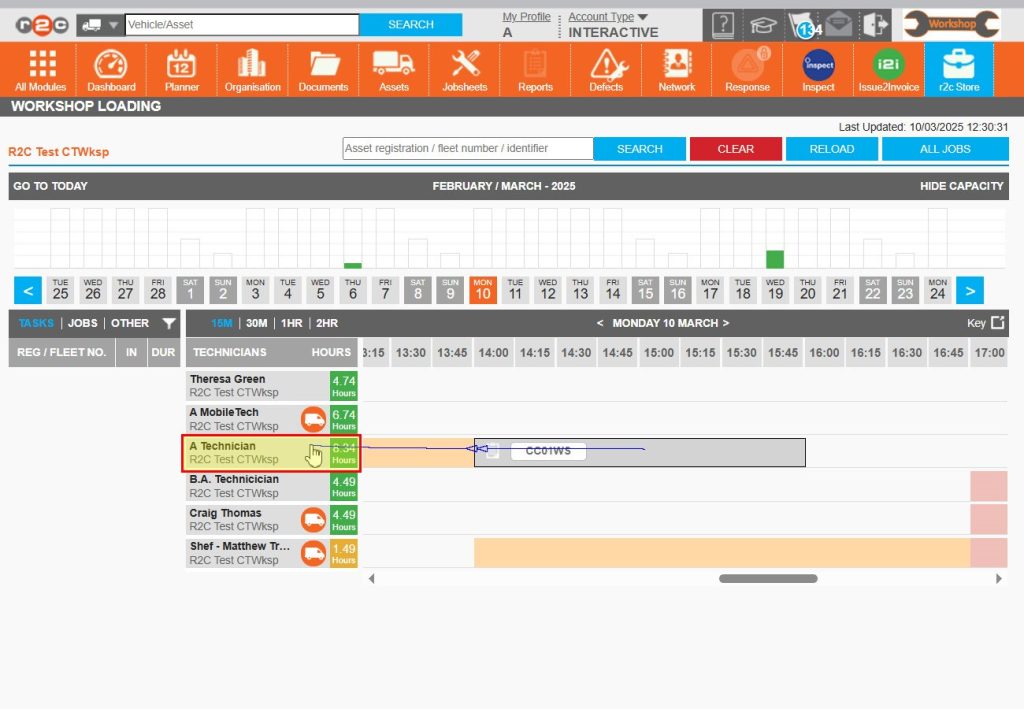
The colour coded capacity chart shows workshop tasks vs available hours at a glance
Allocated tasks can be seen on the timeline. Click on a task to see more details or adjust the time taken to do the job.
Each row represents an individual technician that work can be allocated to. A van icon indicates a Mobile based Technician.
Accounts where multiple internal workshops are managed, can select which specific workshop's technician list they are viewing here. They can also choose to view multiple sites at once when allocating work.
Choose to filter by job, specific tasks or add in other elements such as travel time.
Filter jobs by status e.g. booked
Configuration
Before using the module, it’s important to configure a few key settings to ensure everything runs smoothly and efficiently. From setting up user roles and opening times to configuring shift patterns and jobsheets, each element plays a crucial role in optimizing your workflow. Follow the steps below to get started.
User Roles – To help quickly differentiate between technician types during scheduling you can add a Mobile Technician role to the relevant system. Users assigned to this role will now be visually identified with a Van icon on the WSL (Work Schedule List) screen. This visual cue helps quickly differentiate between technician types during scheduling.
Click or swipe through the 3 steps below to see how to do this.
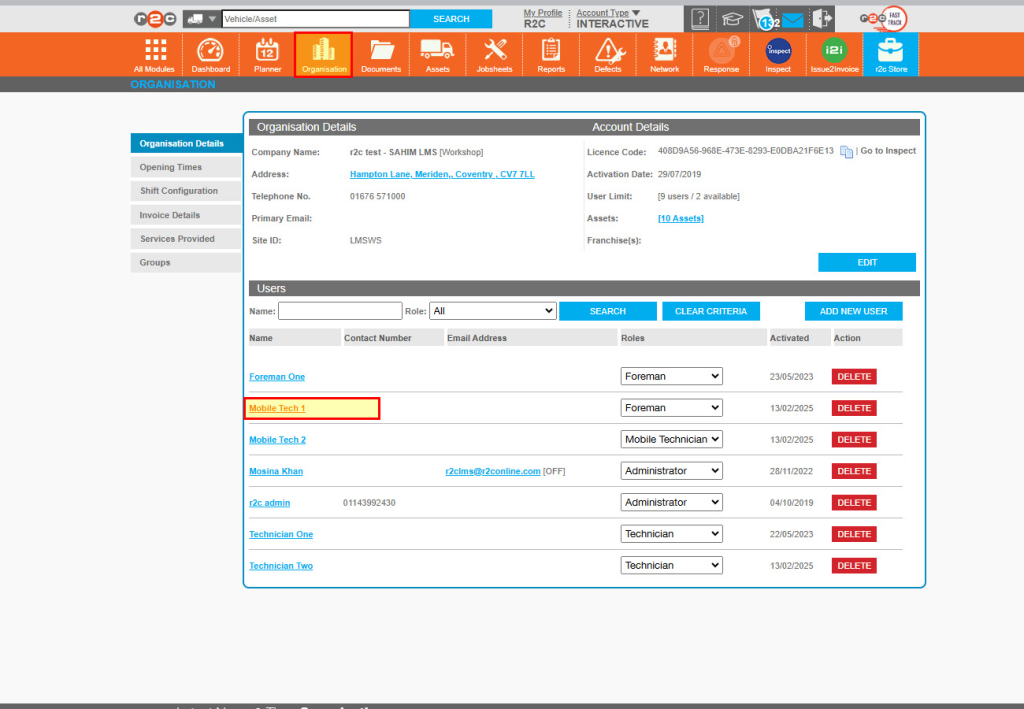
Step 1 - Click the organisation page, and then from the user list, click the name of the relevant user.
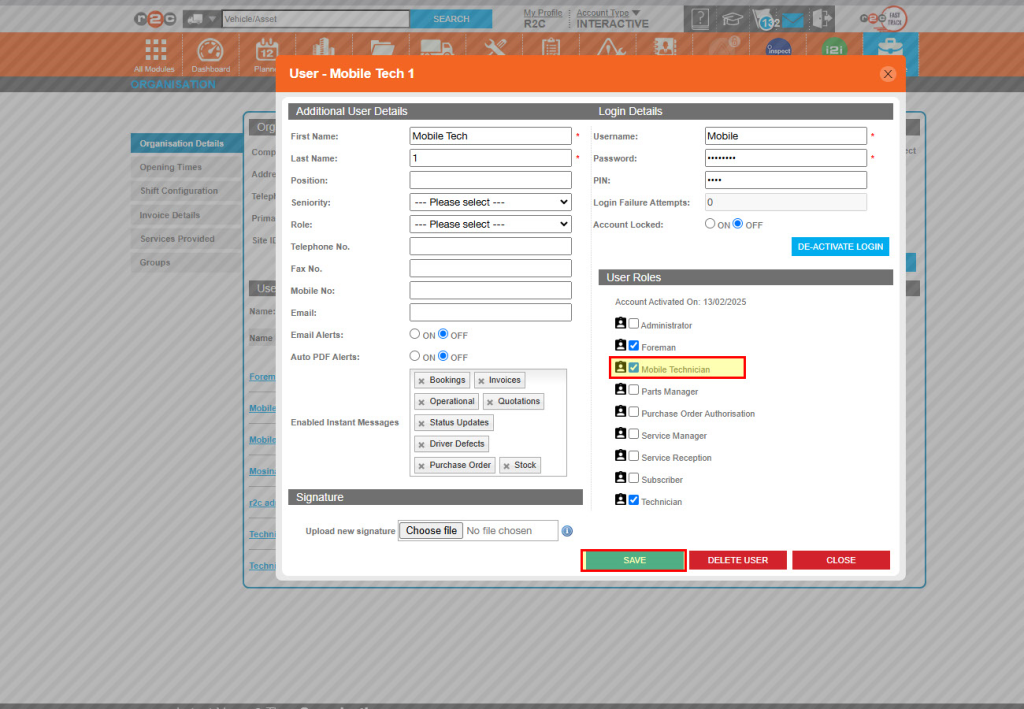
Step 2 - Tick the 'Mobile Technician' role and then Save your changes
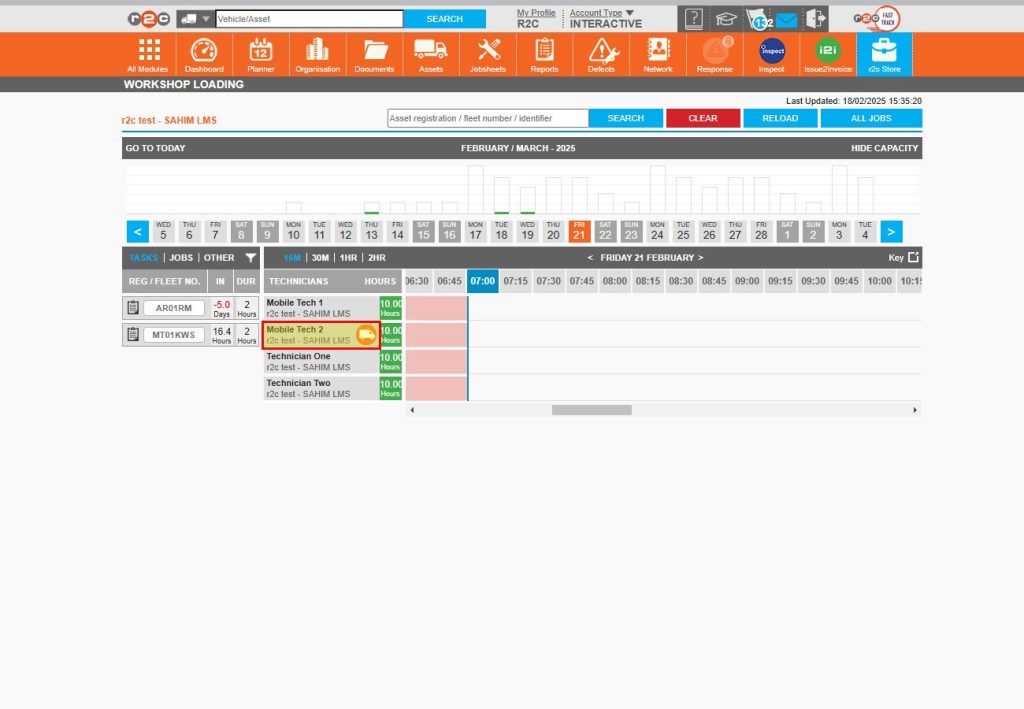
Step 3 - Mobile Technician users will now show a Van icon beside their name on the WSL screen.
Opening Times – Set the opening times for your workshop by choosing an option from the key and then clicking and dragging along the time blocks. These times will be reflected on the WSL screen when allocating work.
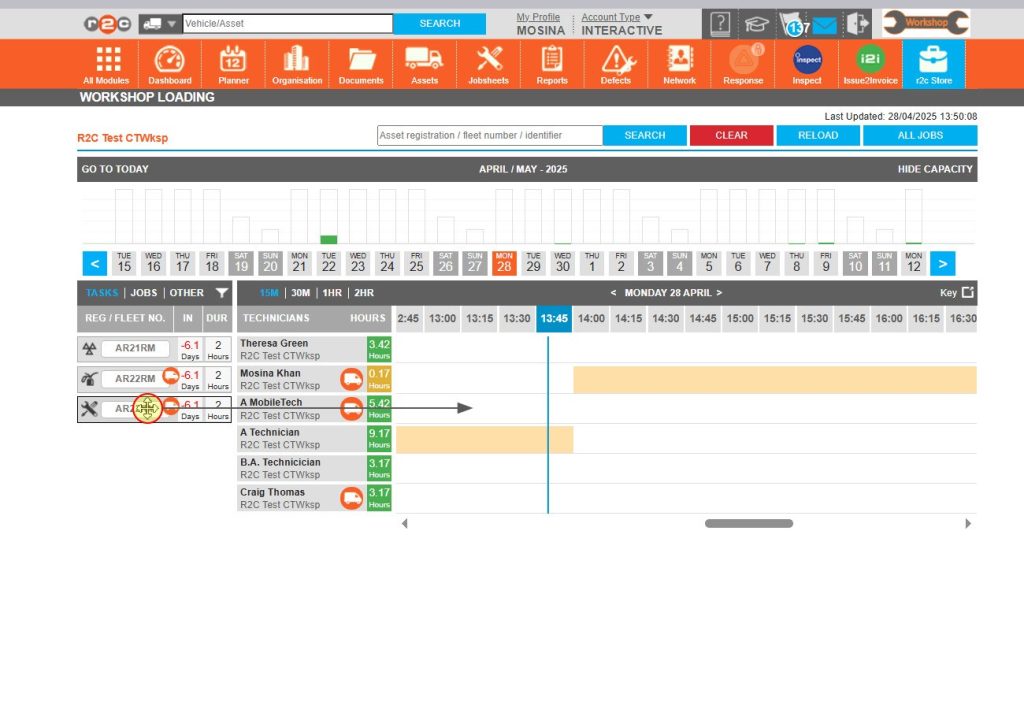
Shift patterns – In the WSL screen, you can set individual shift patterns for the technicians. This will help with assessing availability when allocating work. You can also set the type of vehicles a technician is able to work on based on weight bands.
If work is allocated to a technician whose qualifications or permissions do not match the weight band of the asset, an error message will appear in the top-right corner of the screen.
Click or swipe through the 4 steps below to see how to do this.
Note: This message is a warning only—it does not prevent you from allocating the work.
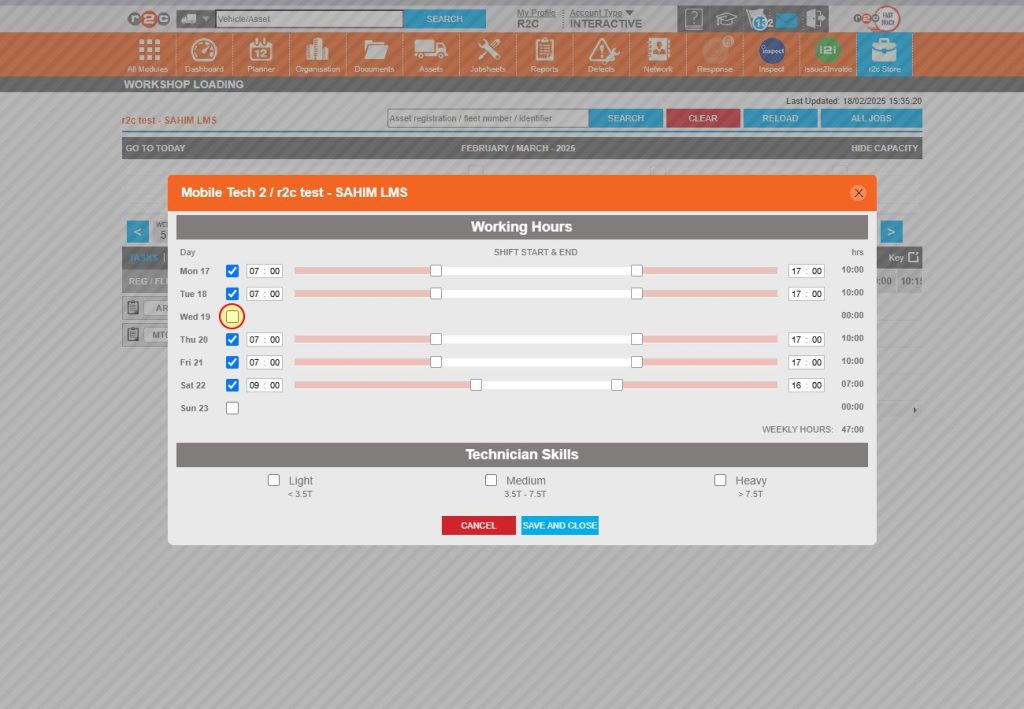
Step 1 – Click on the name of the technician you want to add shift details for.
Step 2 – Tick the relevant weekday you want to include as a working day
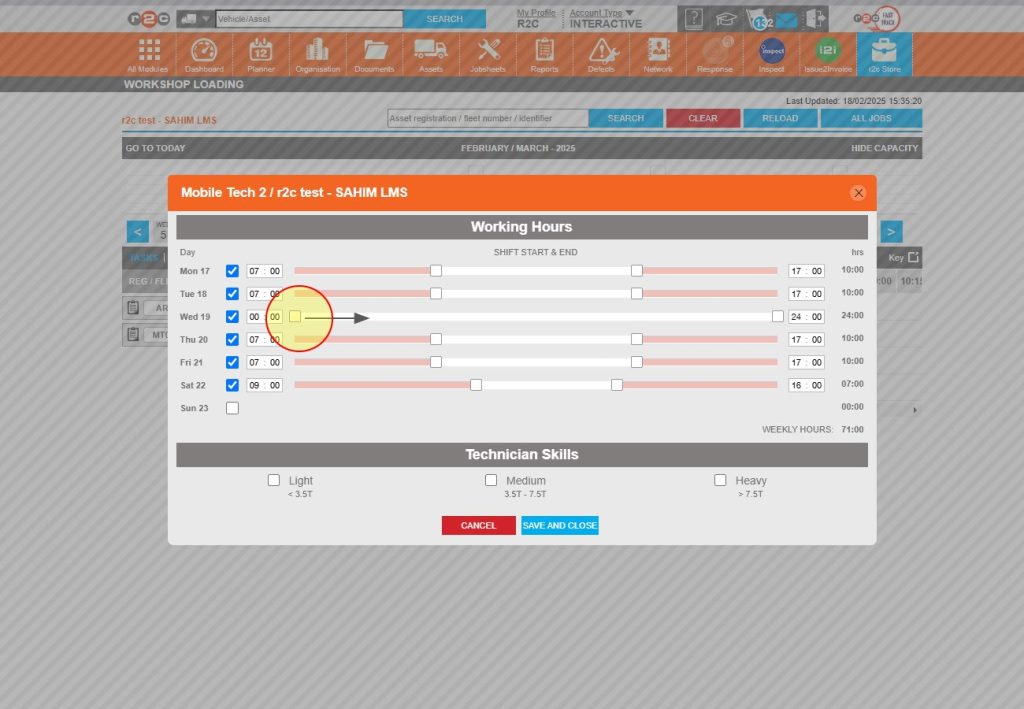
Step 3 – Use the sliders to set the technicians work hours.
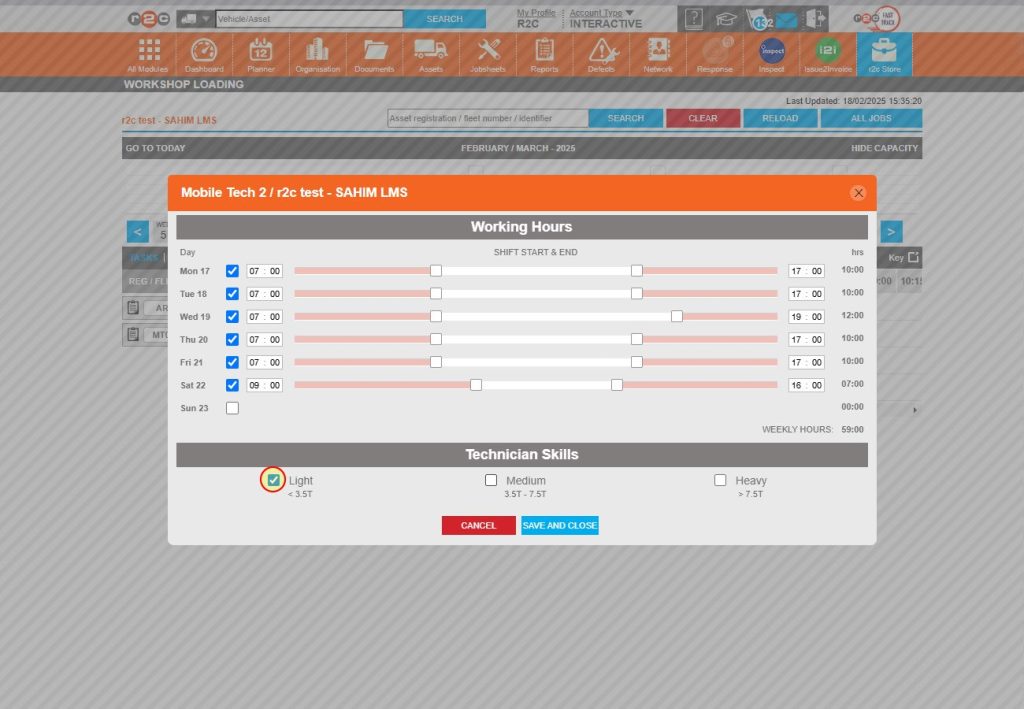
Step 4 – Tick the vehicle weight bands that the technician can work on, click ‘SAVE AND CLOSE’ to save the changes.
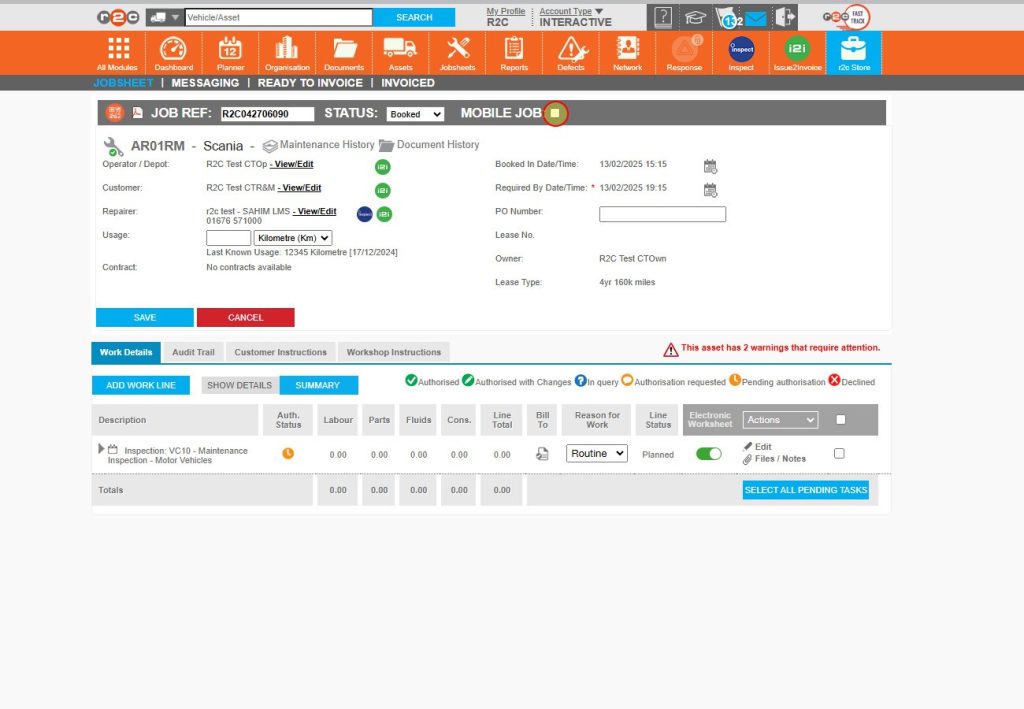
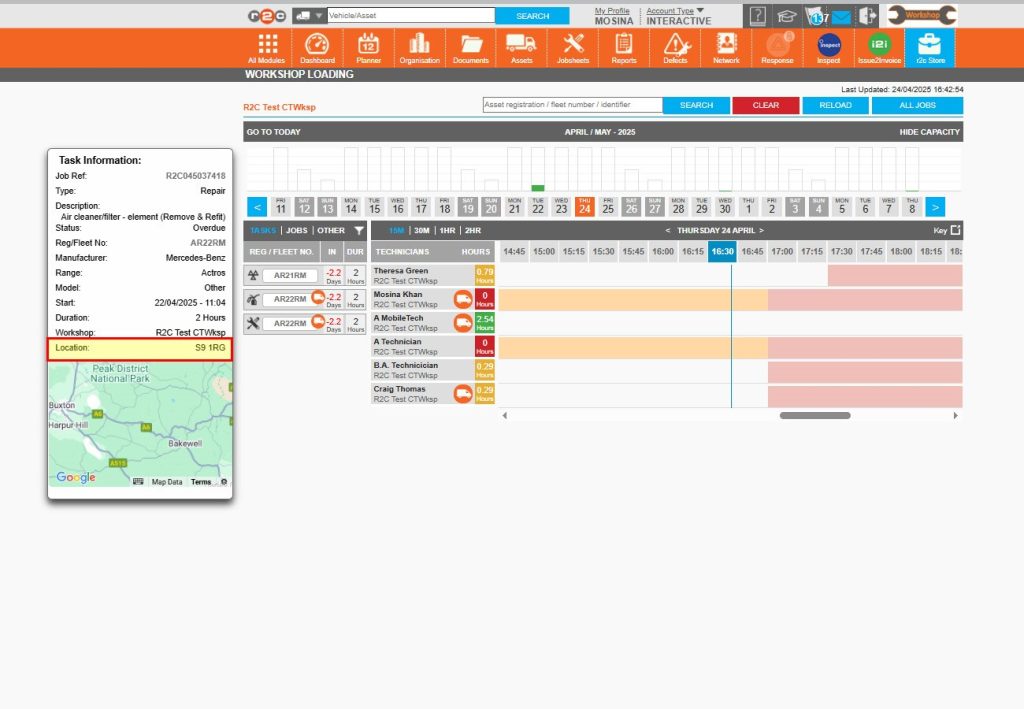
Jobsheets – Where Jobsheets are allocated to Mobile technicians an additional flag can be added to highlight that the job is Mobile based. These details are also added to the WSL screen, where the technicians can see the Van icon and location details.
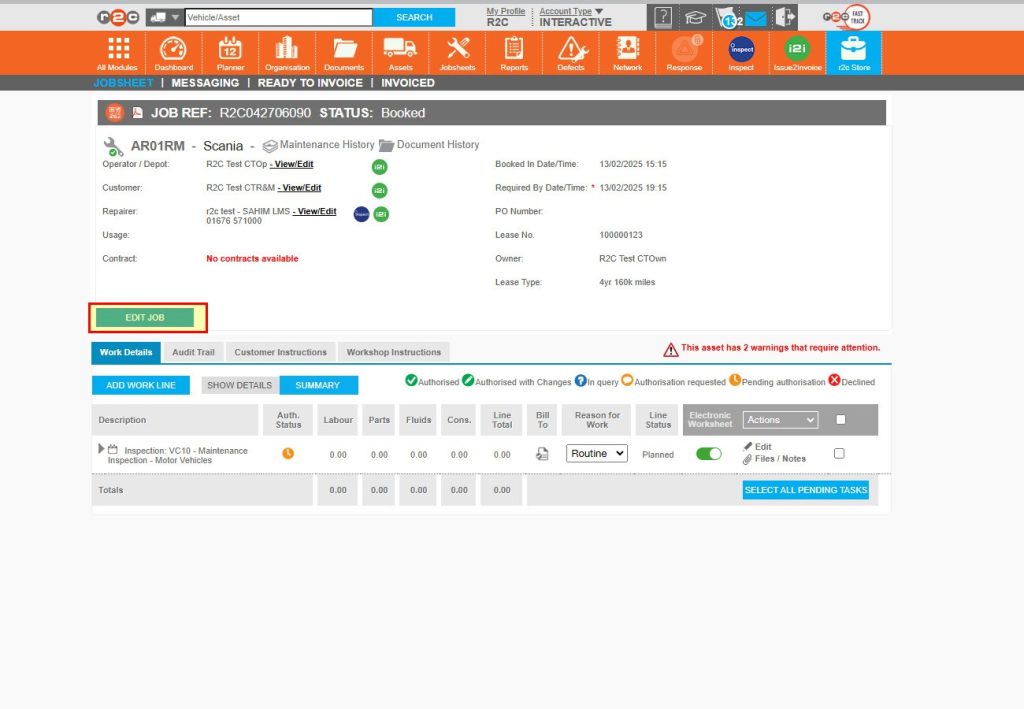
Step 1 – Start by clicking ‘Edit Job’
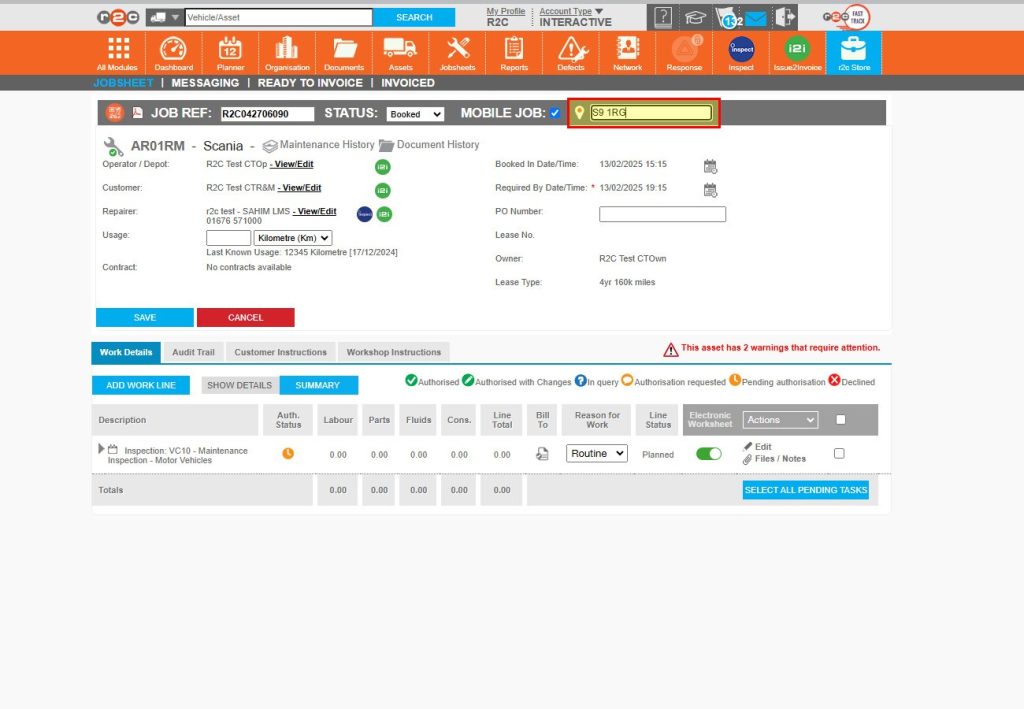
Step 2 – Next, tick the ‘Mobile Flag’ checkbox
Step 3 – Enter the postcode for the job location
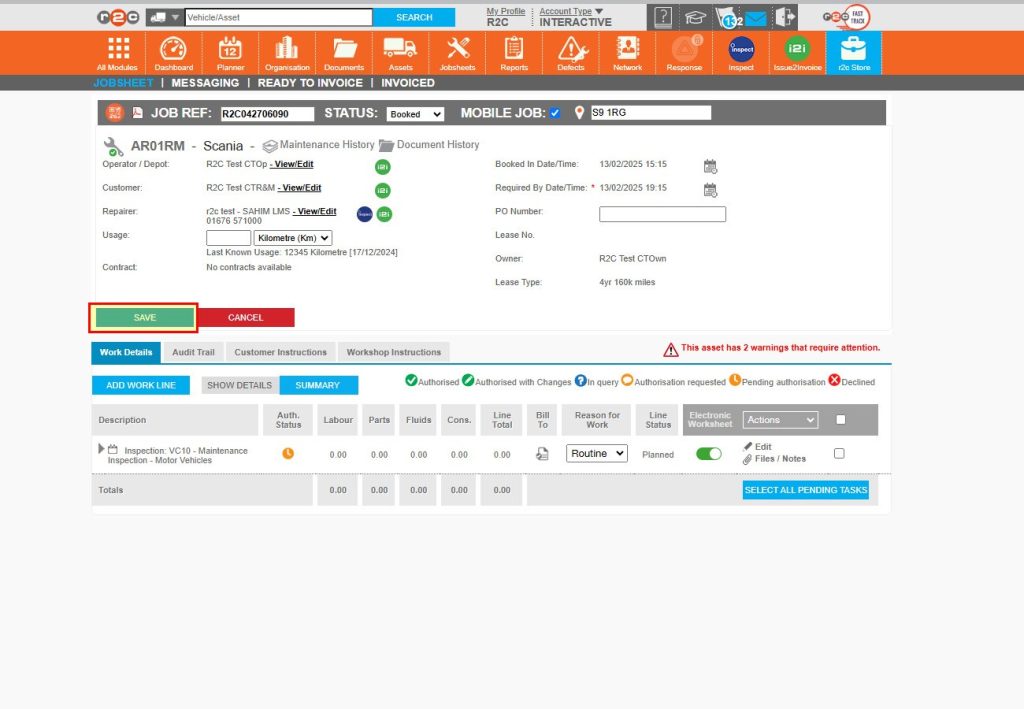
Step 4 – Save your changes and confirm using the pop-up box.
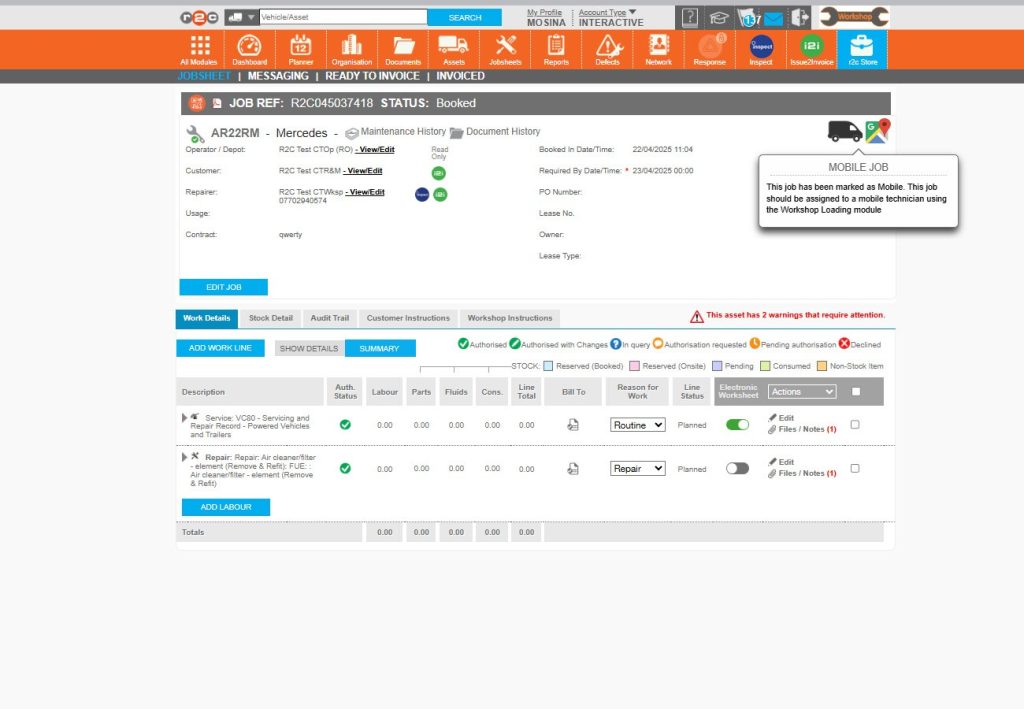
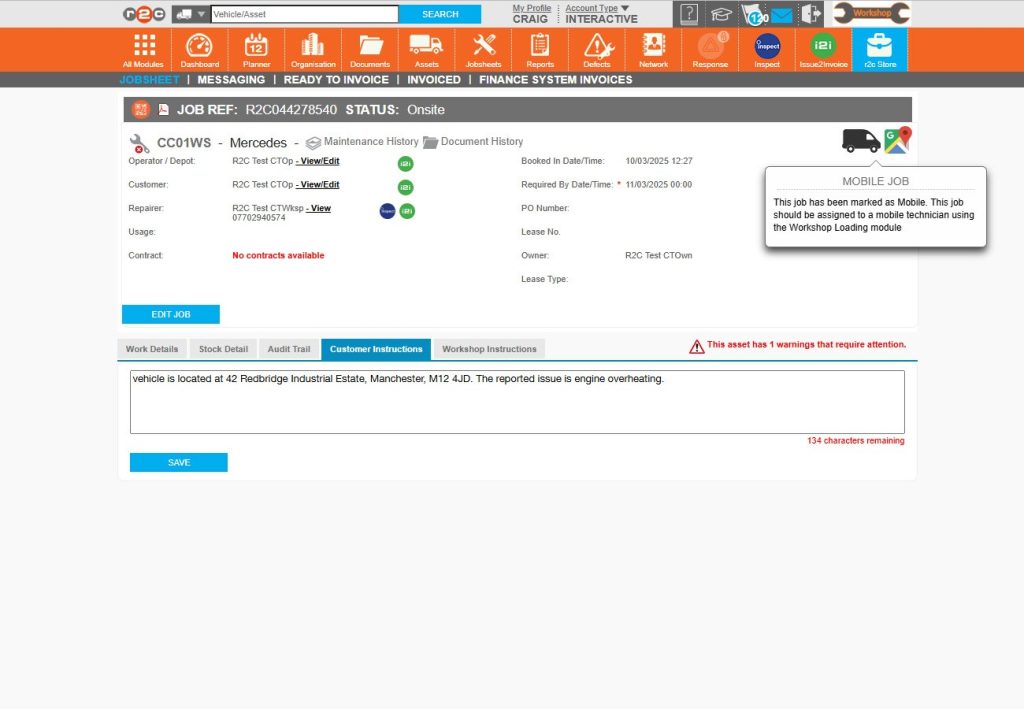
Step 5 – The jobsheet will now show a Mobile Job icon
Step 6 – The WSL screen will also show a mobile job/van icon against the job.
Step 7 – Click on the job tile to see the location information
Workshop Loading (WSL)
Once the key areas such as opening times and shift patterns have been configured, you can begin allocating work to individual technicians.
Follow the steps below to allocate work items and also see how to pick up and start a jobsheet once allocated.
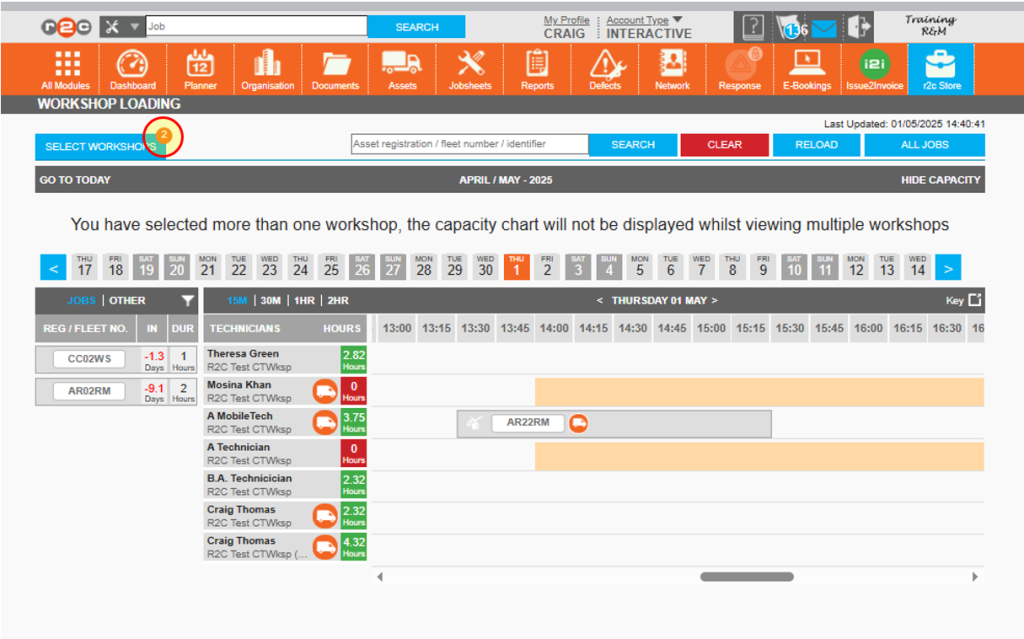
Managing Multiple Sites in WSL – For accounts that manage multiple sites, you can choose to view and allocate work for individual or multiple internal workshops.
When you first open the WSL module, you’ll be prompted to select which workshops you want to view. You can update or change your selection at any time by clicking the ‘Select Workshops’ button. This allows for flexible management and allocation of work across various locations.
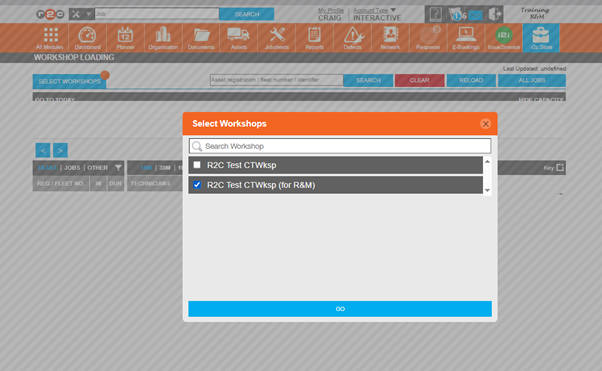
Step 1 - Click the 'SELECT WORKSHOPS' button from the WSL screen
Step 2 - Select an individual site, or tick multiple locations and then click 'GO'
Work Allocation- To see the steps taken to allocate work to technicians, click or swipe through the 8 steps below.
Step 1 – First, choose the relevant filter for example you can choose to allocate a whole job to a technician or filter by tasks to allocate an individual work item.
Step 2 – Click on a work item and use the drag and drop function to add this to a technician’s workload.
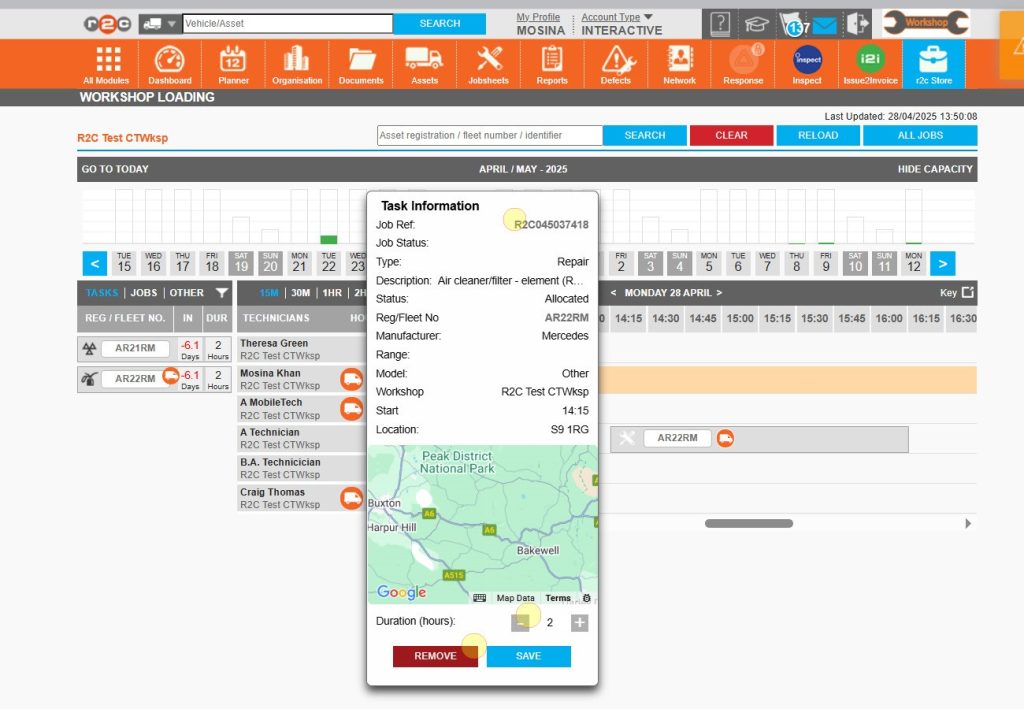
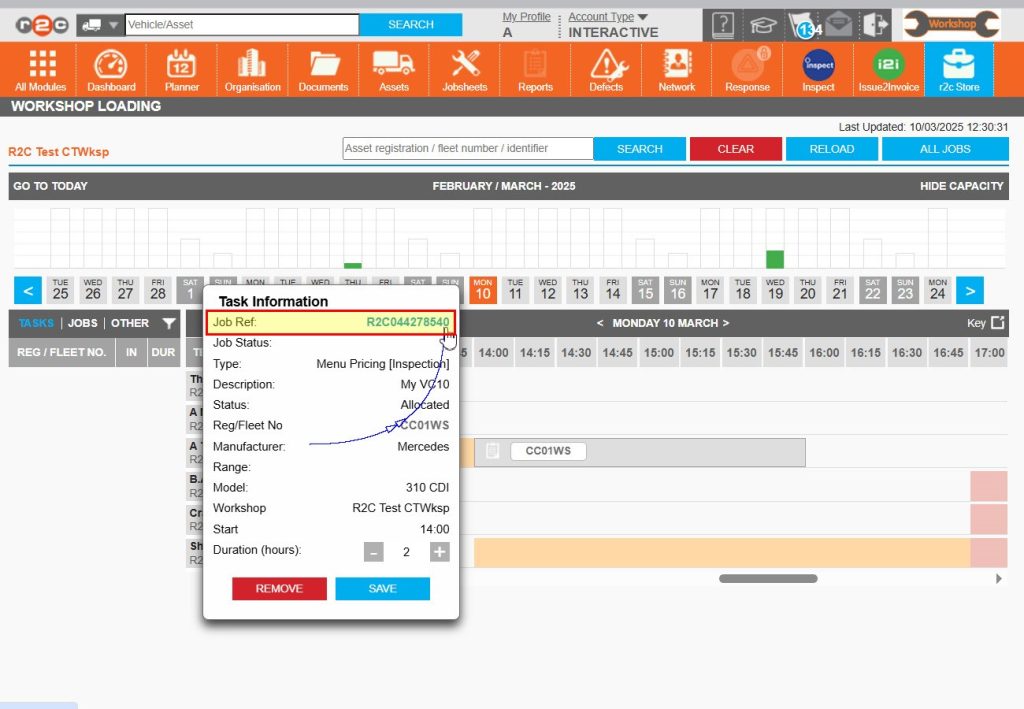
Step 3 – Click on an allocated item to see further options. From the pop-up you can click the job reference number to go to the jobsheet itself. This is also where you can amend the duration and then save your changes. If needed, this is also where you can remove a work item from a technician’s job list.
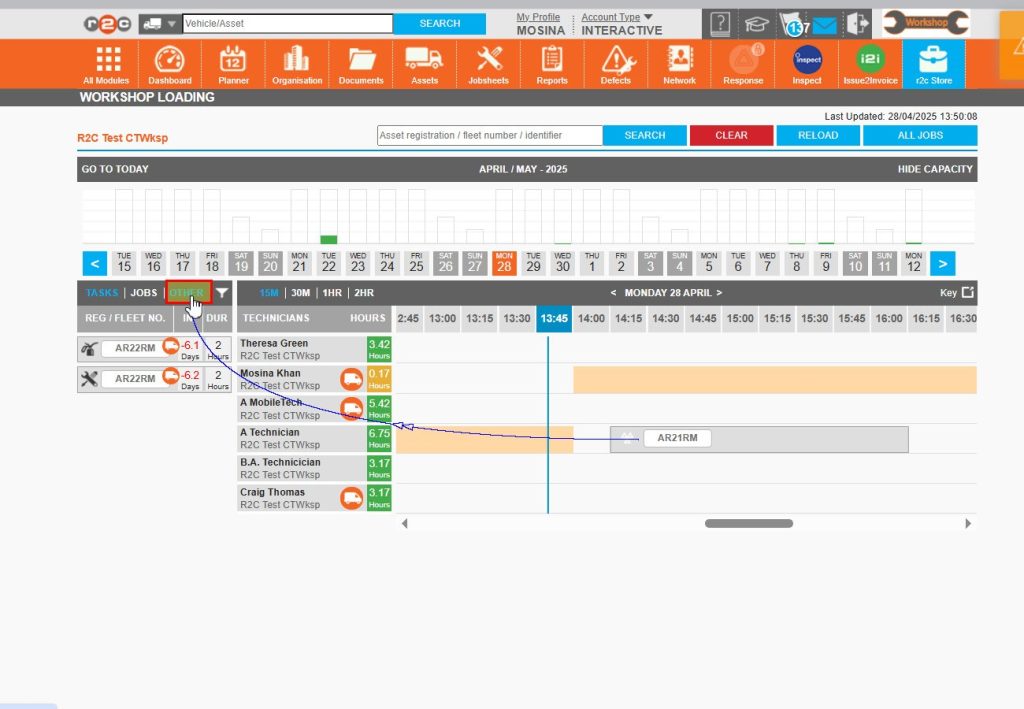
Step 4 – From the filter headings you can also add additional non work items to the technician’s schedule. Start by clicking the ‘Other ‘filter.
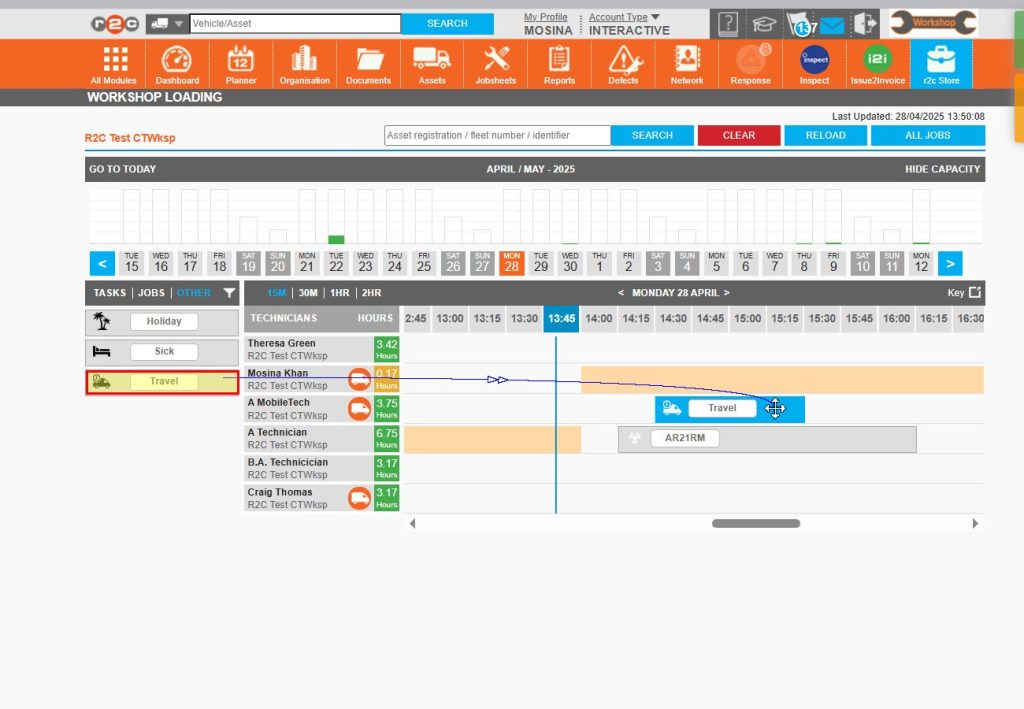
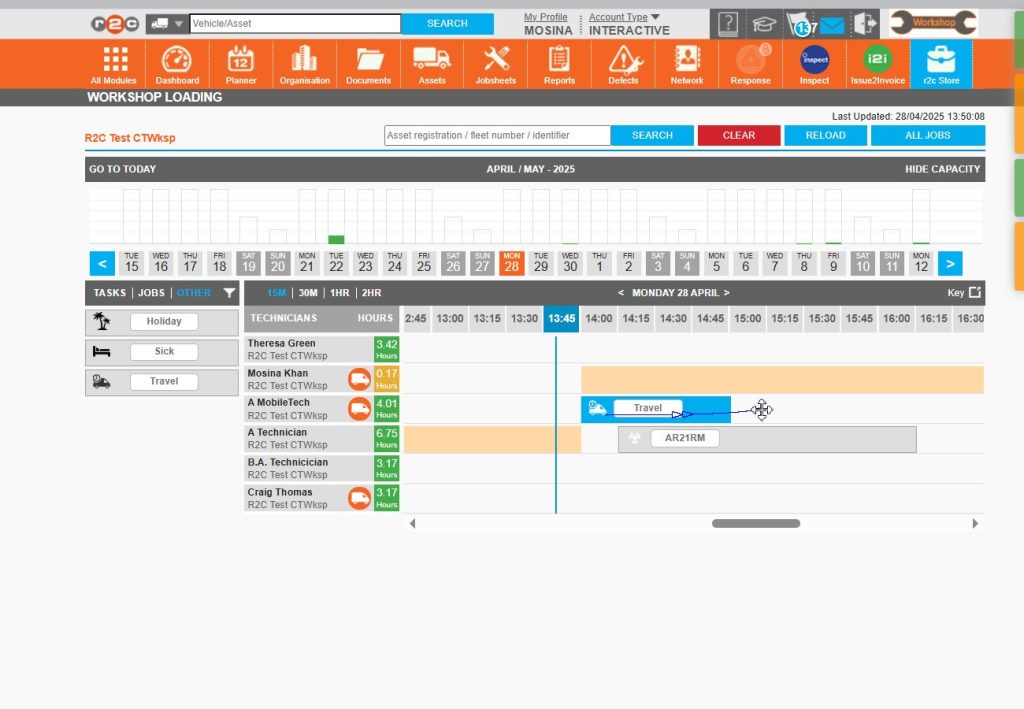
Step 5 – Select an item e.g. Travel and use the drag and drop function to add it to the technician’s timeline.
Step 6 – Use the drag and drop option to move the item along the timeline as needed.
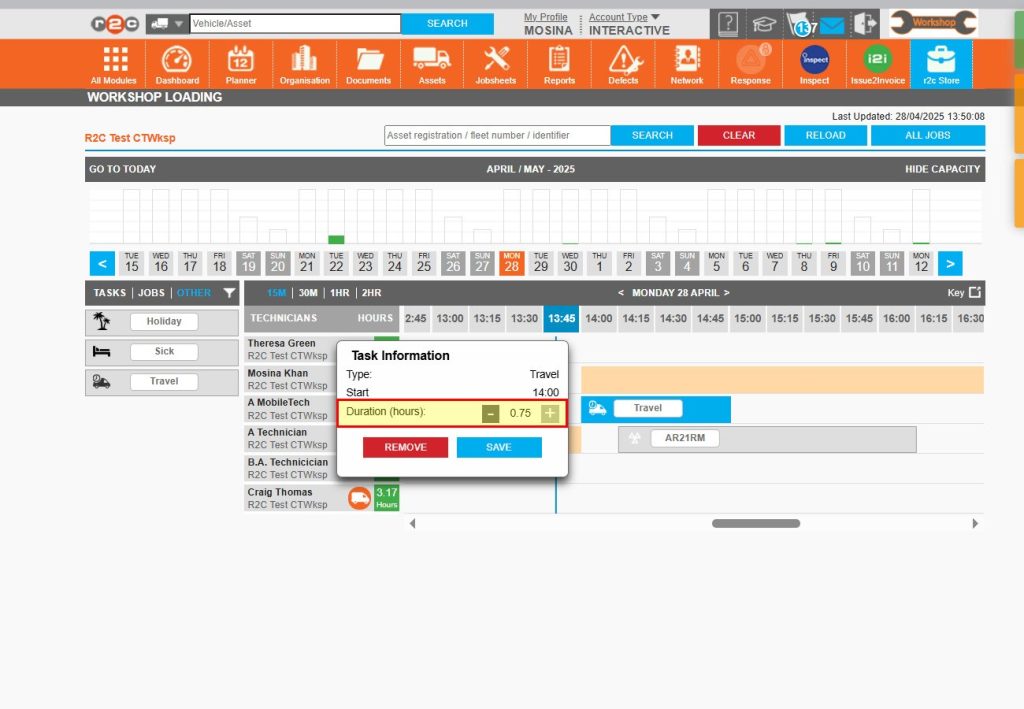
Step 7 – Click on the item, in this case ‘Travel’, in the popup box adjust the duration as needed and then Save your changes.
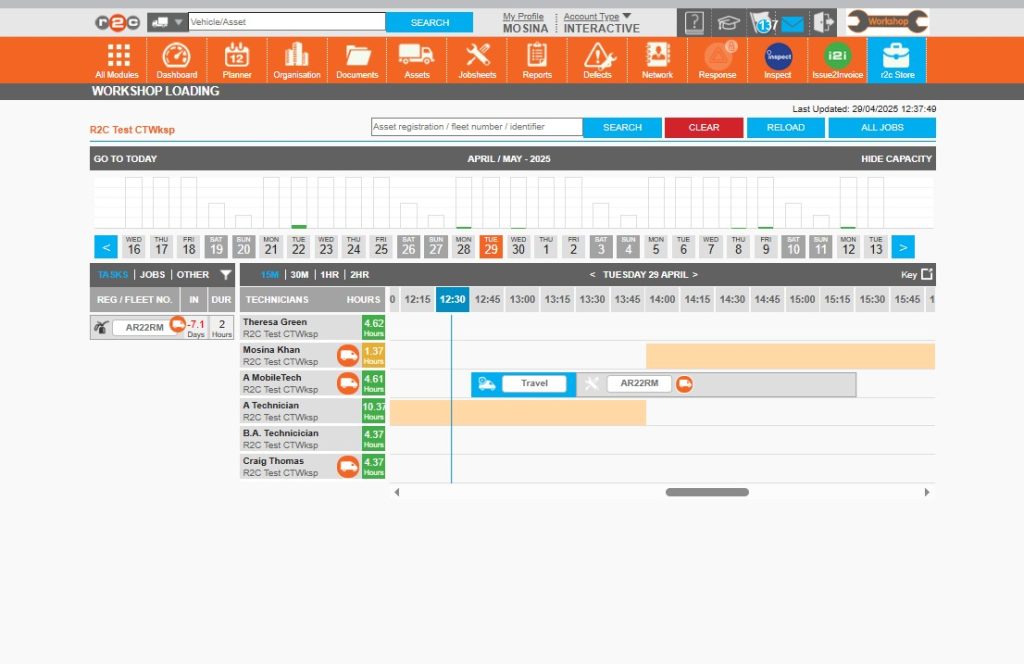
Step 8 – Repeat the process to plan out the daily job list for both mobile and static technicians.
Updating defect only jobs –
Defect tasks are not visible in the WSL (Work Scheduling List) view and therefore cannot be actioned directly. To make these tasks actionable, they must be updated from a defect to a repair.
Steps to manage defect-only jobs:
Use filters to identify defect-only jobs that may have been missed during the WSL allocation process.
Update the task type from defect to repair to make the job visible and actionable in WSL.
Once updated, allocate the job as usual using the standard WSL allocation steps.
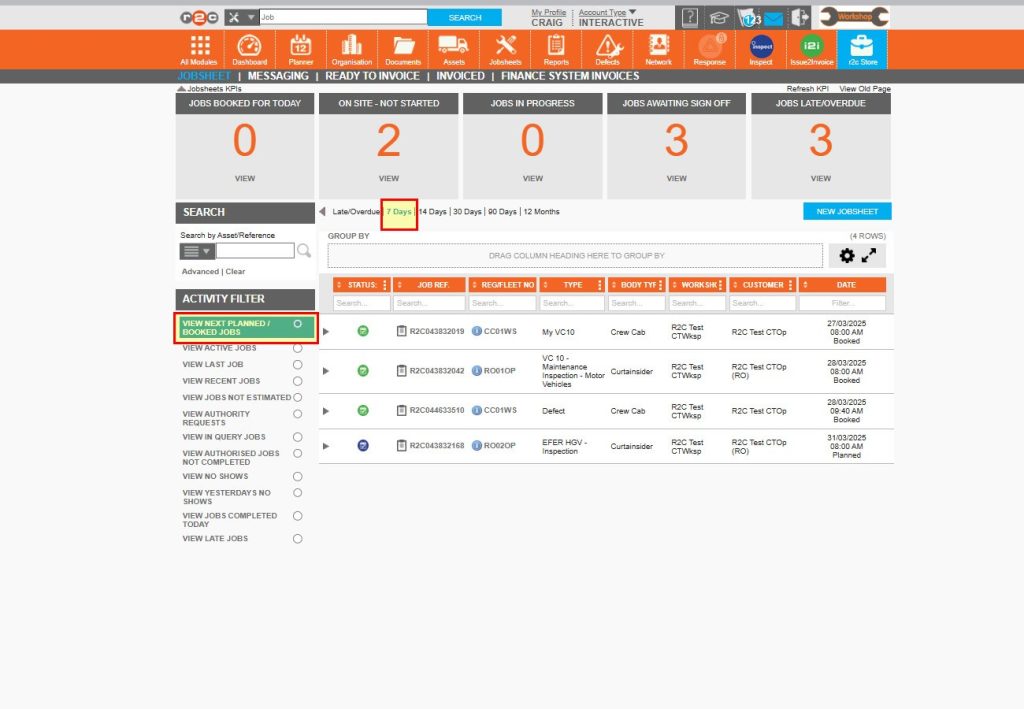
Step 1 – Start by clicking the ‘view/next’ planned filter and then choosing a date rang e.g. ‘7 days’
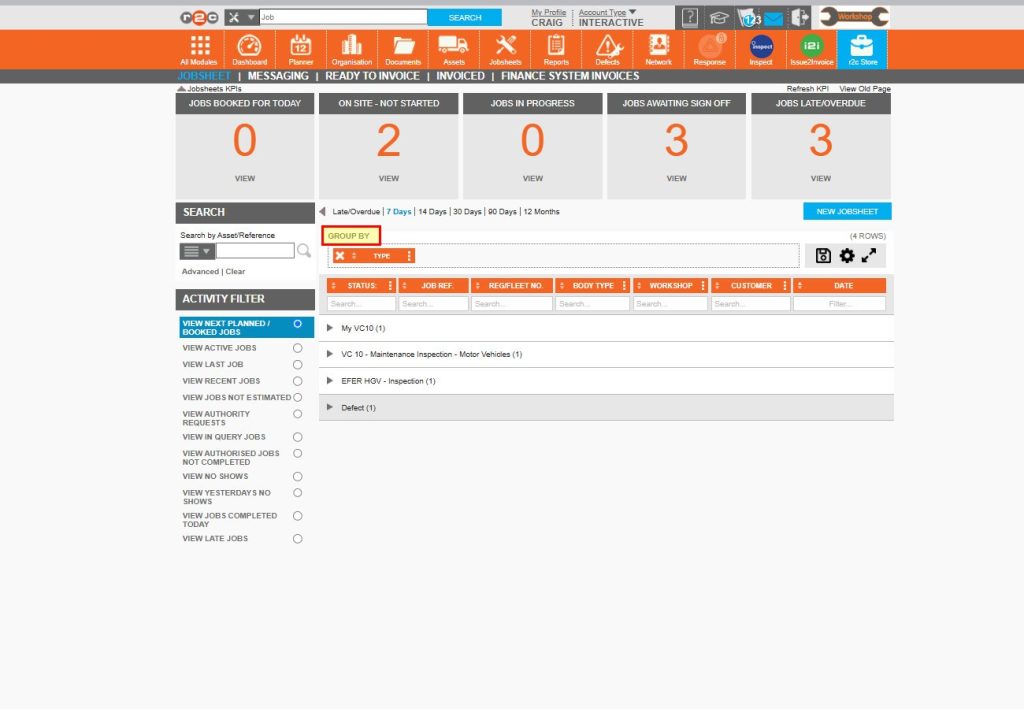
Step 2 – Next, you can use the headings to filter further, drag and drop a heading to the group by section e.g. Job type
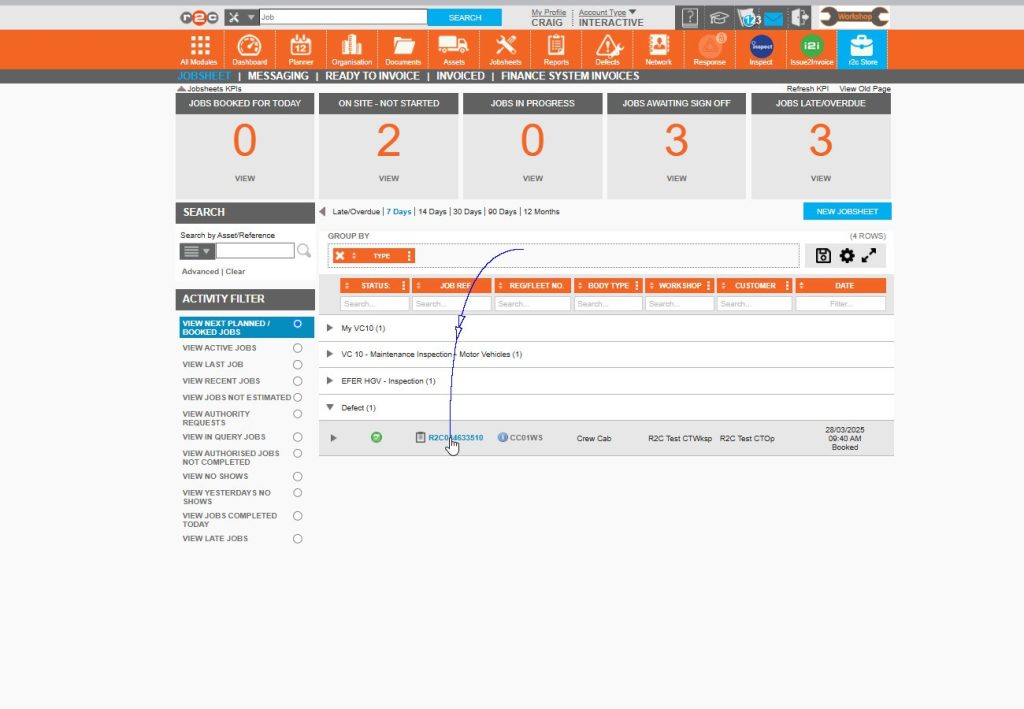
Slide 3 - Click on the arrow to expand the group, in this example there is one job with work type ‘defect’. Then click on the job number to open an individual jobsheet.
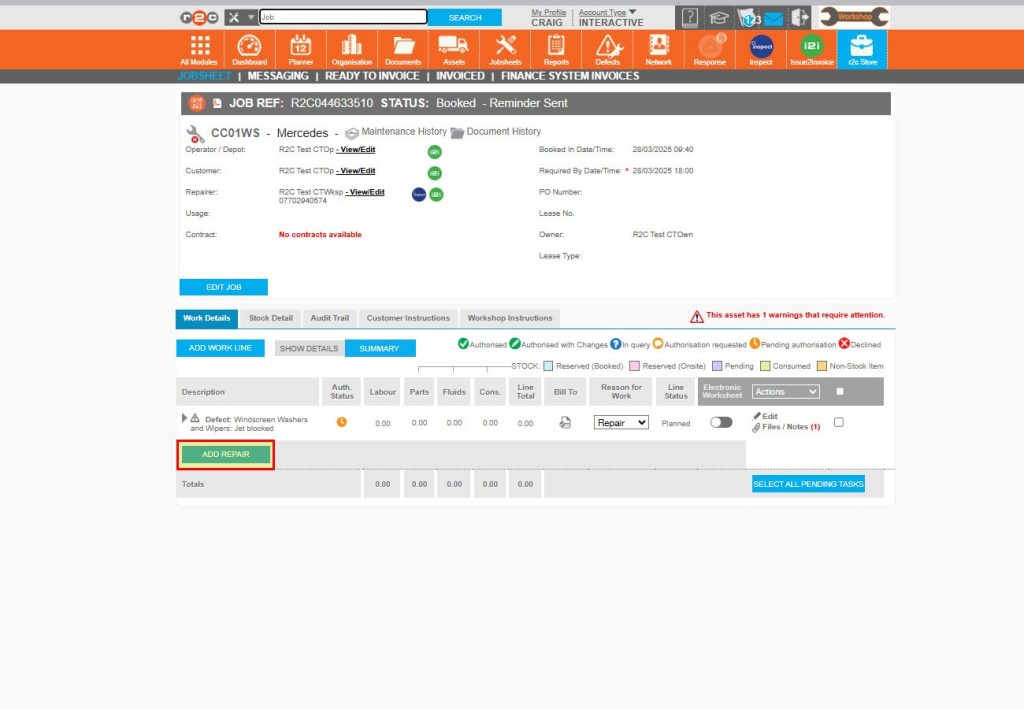
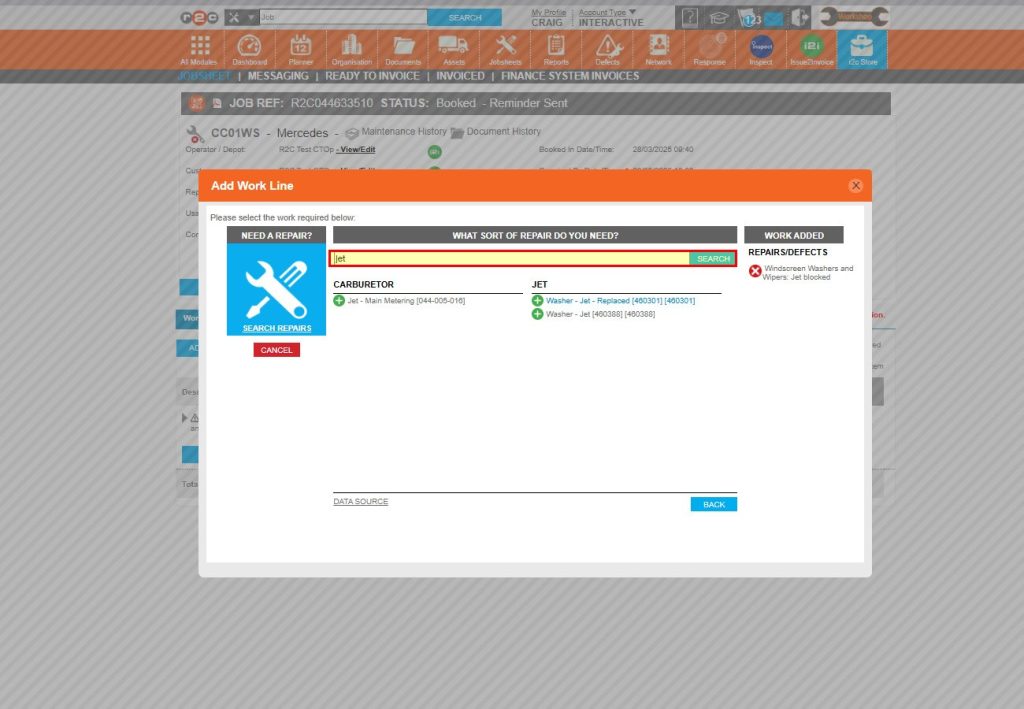
Step 4 – Click on ‘Add repair’ below the relevant defect line.
Step 5 – In the pop-up window, search for the repair needed and then click on a match to add the work line.
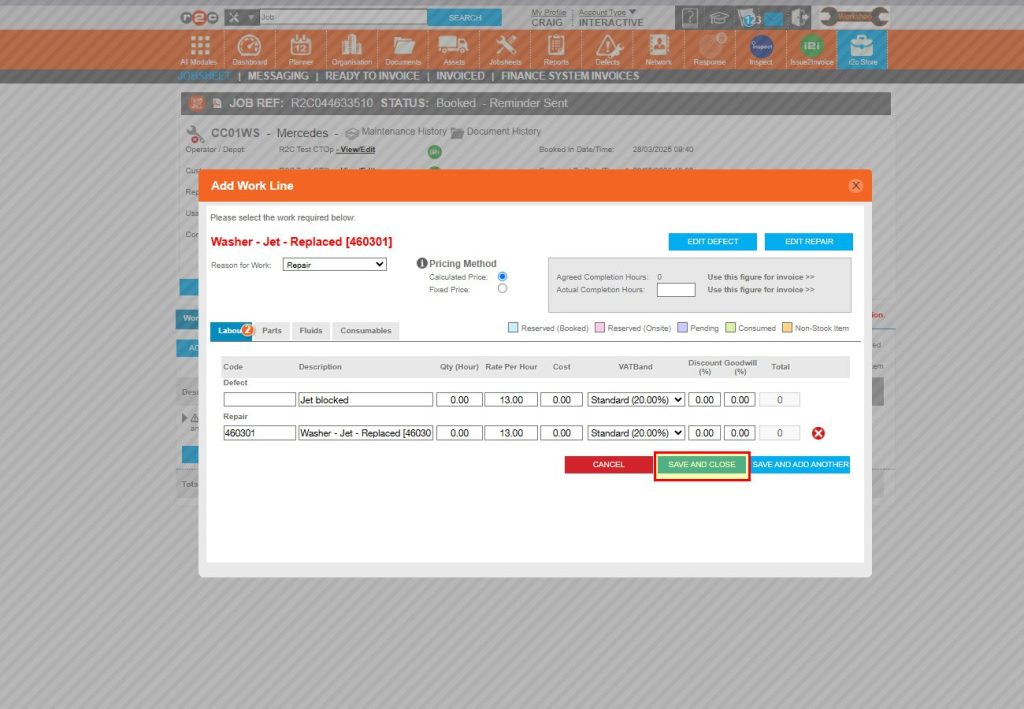
Step 6 – Update the details as needed and then click ‘Save and Close’
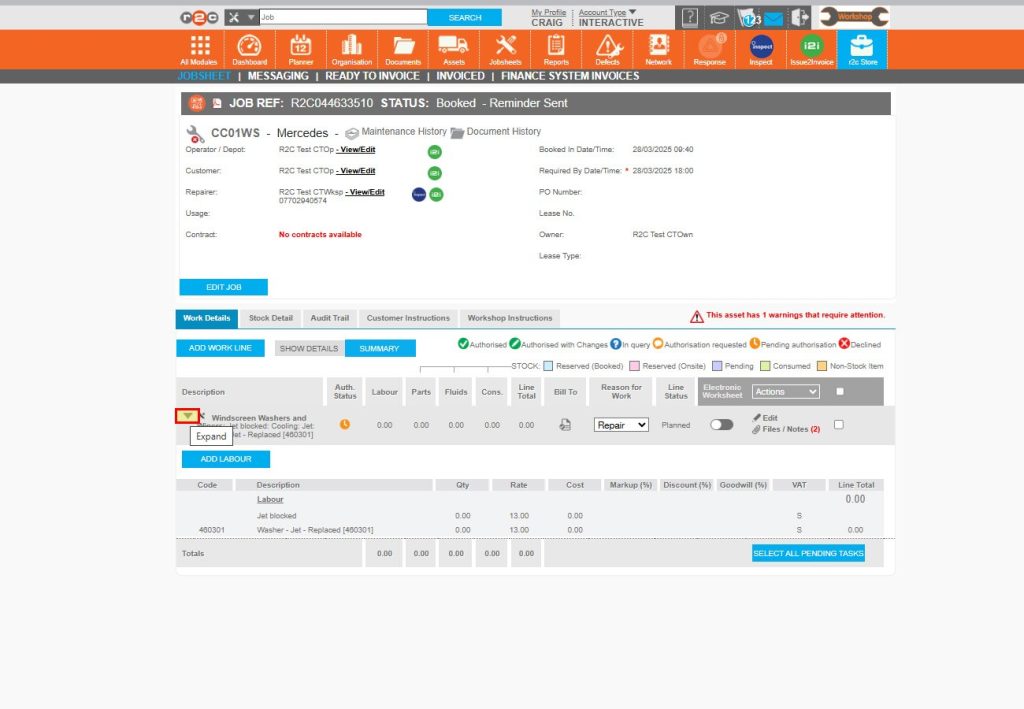
Step 7 – Use the arrows to expand a work line and see the updated description with the defect and separate repair.
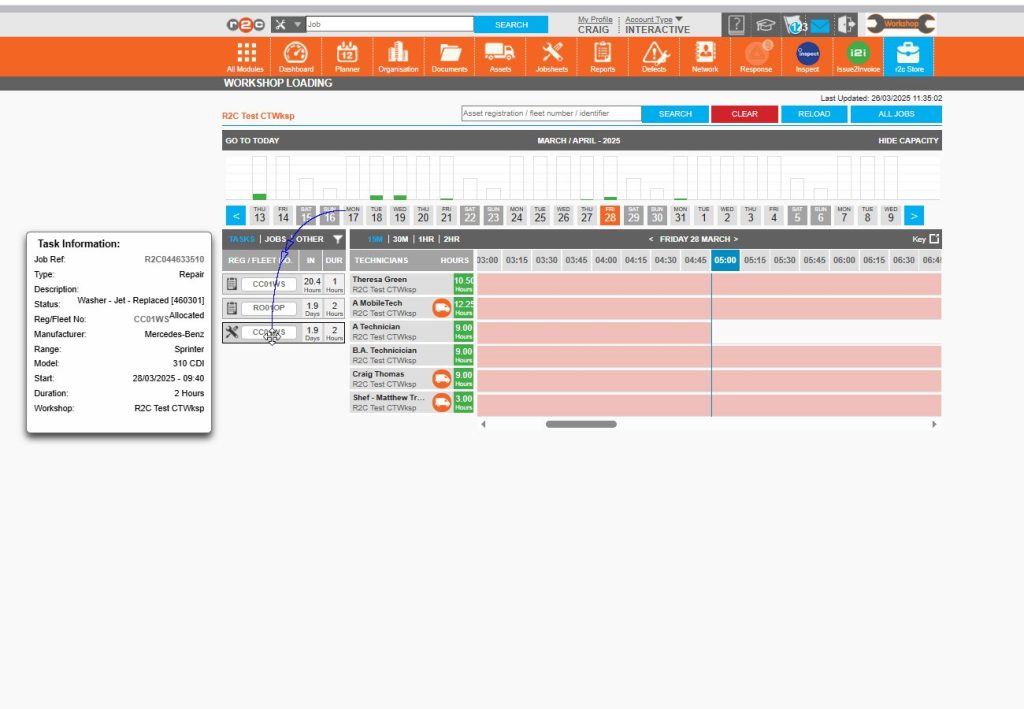
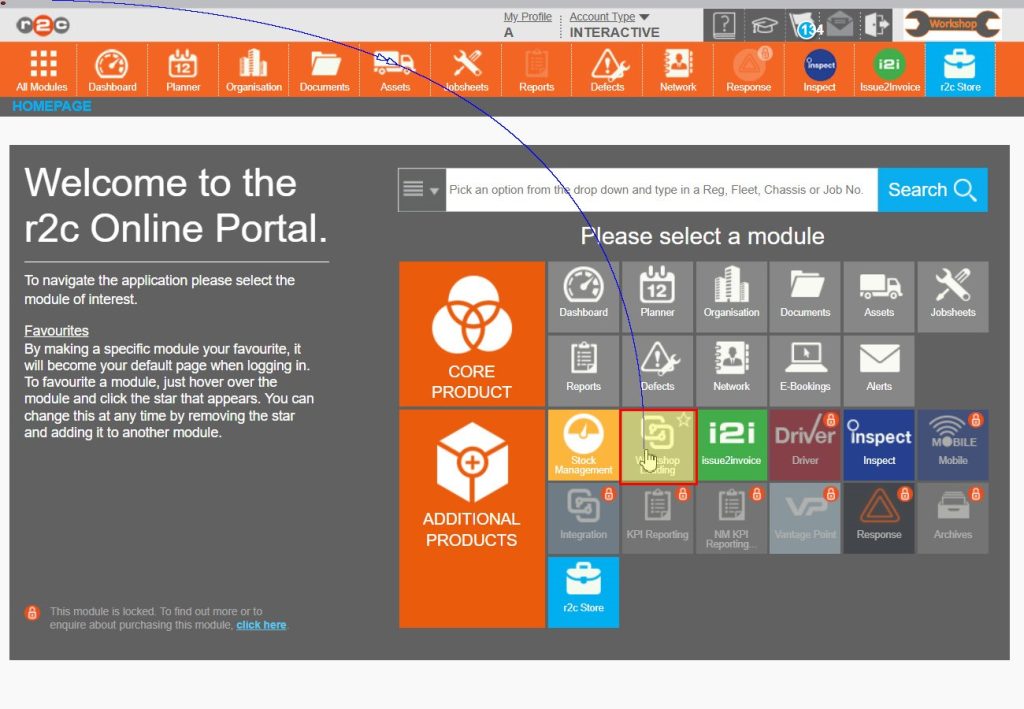
Step 8 – Click on ‘All Modules’ to return to the menu and then click on the Workshop Loading Module icon
Step 9 – The job is now available to allocate to a technician, using the drag drop function.
Picking up work – To review your workload and select an item of work to start, click or swipe through the 14 steps below.
Step 1 -Start by clicking All Modules from the header bar and then the Workshop Loading Module. You can also star this as a favourite so that upon login you will be redirected to WSL as default.
Step 2 –Your name will appear in the list of workshop staff, allowing you to review your workload.
Step 3 –Start by clicking an item of work assigned to yourself. to view the details. Click on the r2c Job Reference to go to the jobsheet itself.
Step 4 - Once on the jobsheet, Mobile Technicians will see additional details to indicate the job location
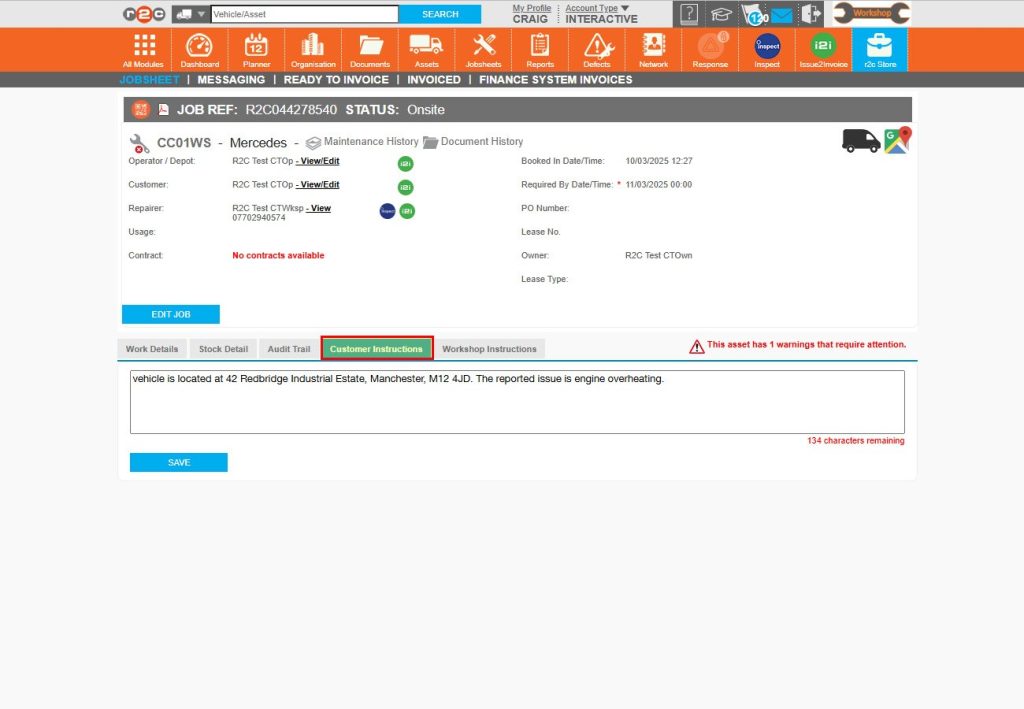
Step 5 - There may also be additional details about the job e.g. for a breakdown on the customer instructions tab.
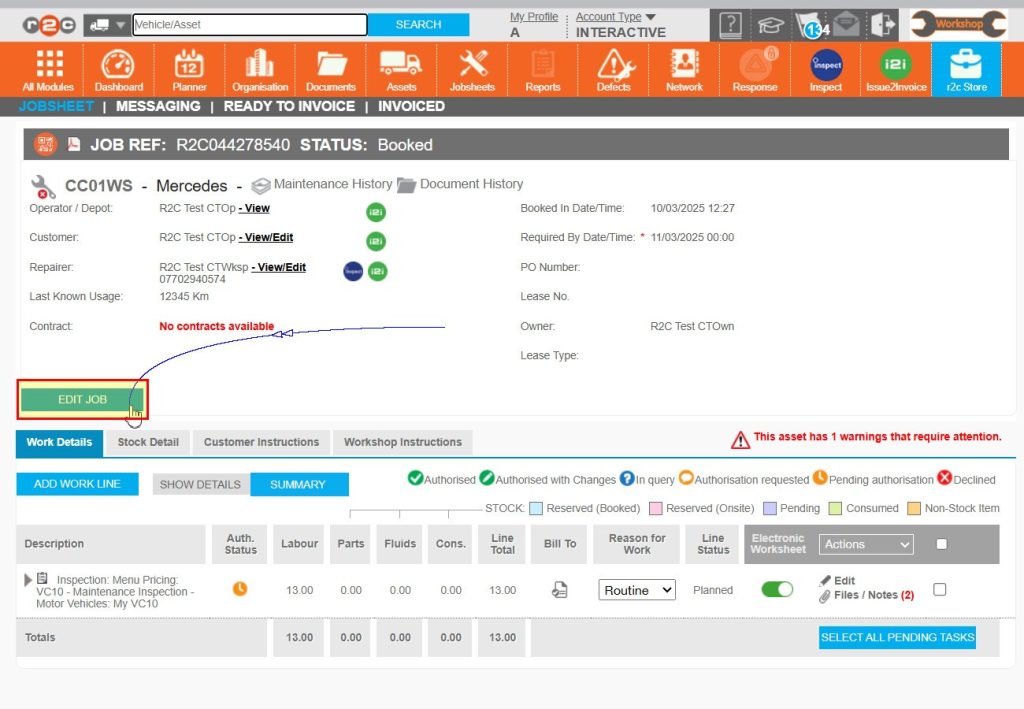
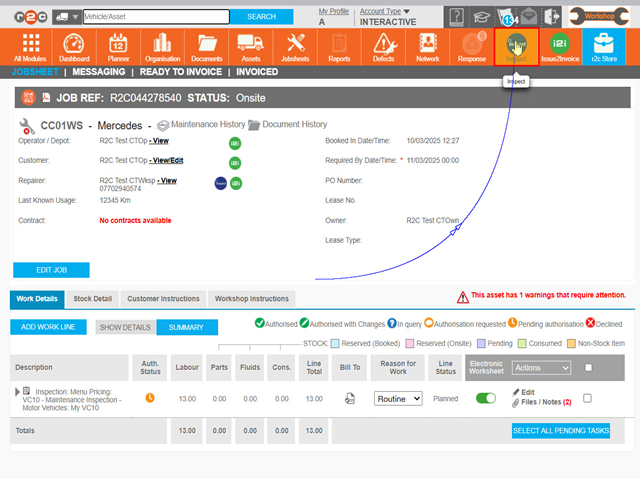
Step 6- To begin work, start by MARKING THE JOB Onsite. Click ‘Edit Job’
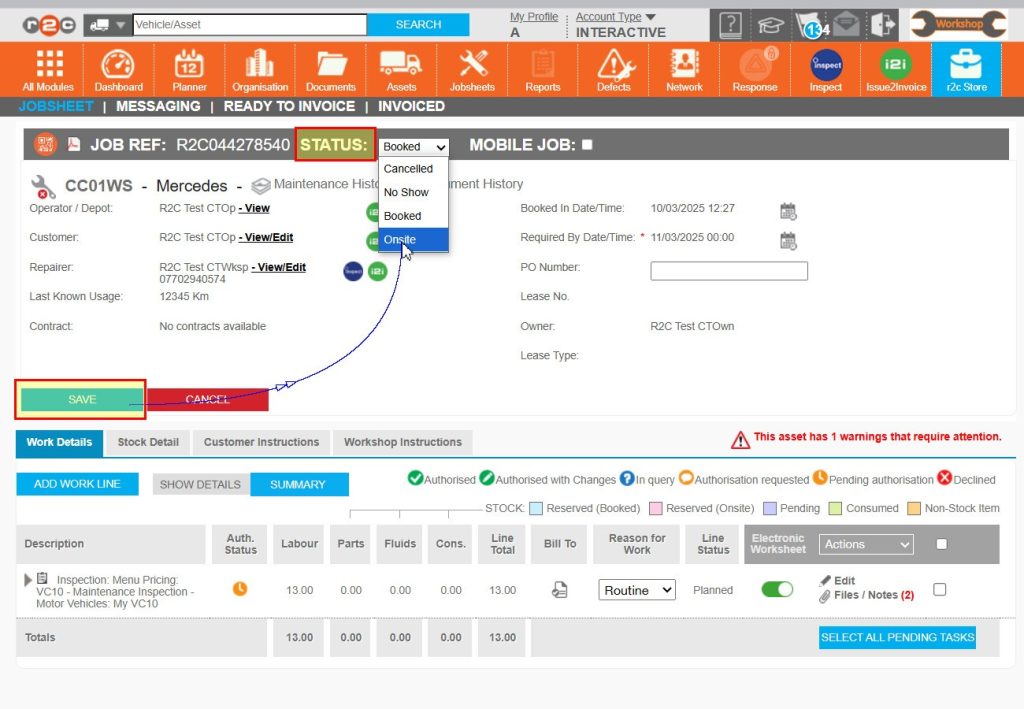
Step 7 - Next, from the job status drop down menu select ‘Onsite’
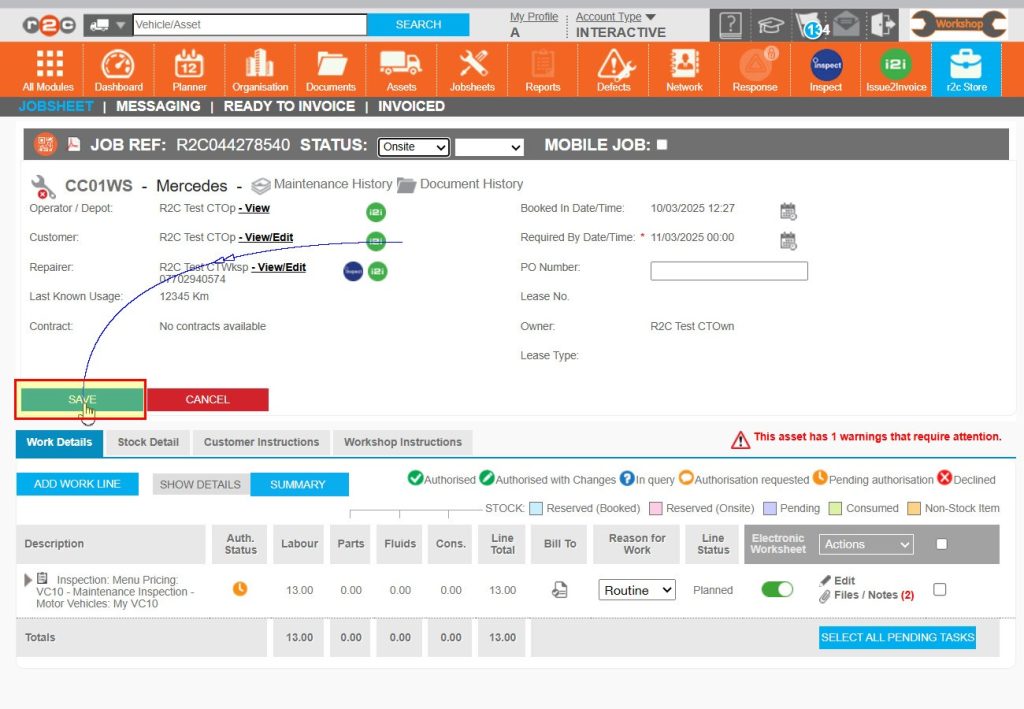
Step 8 - Click ‘Save’ and confirm your changes to continue
Step 9 – Click the Inspect icon to login to Inspect and complete the digital jobsheet.
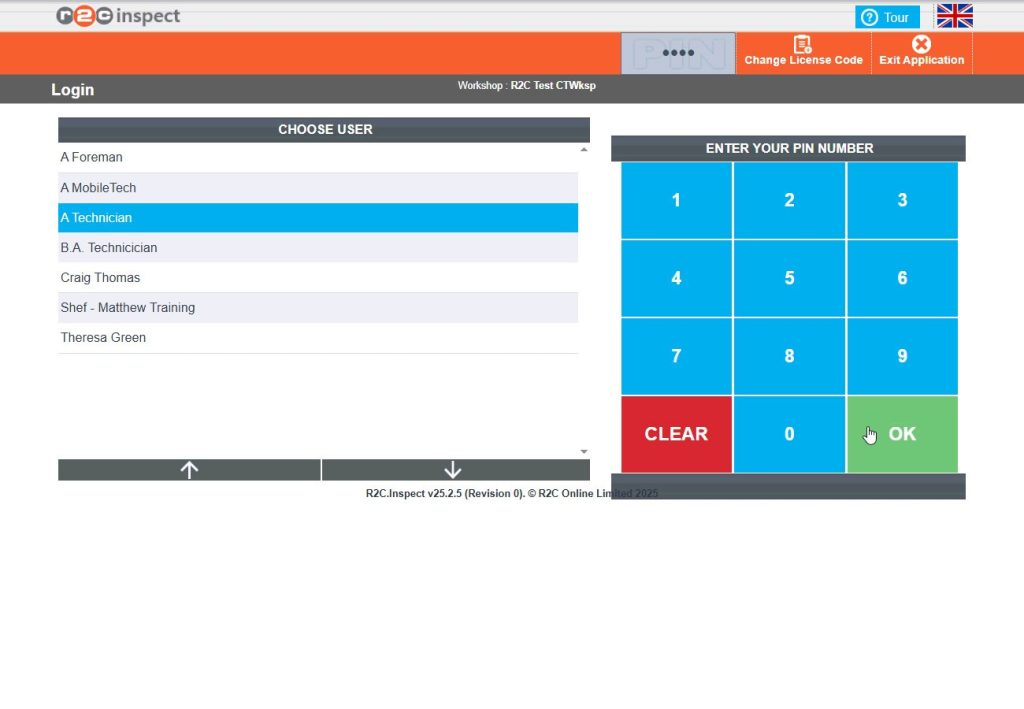
Step 10- To login, select the correct username from the list on the left followed by the four-digit PIN before clicking OK.
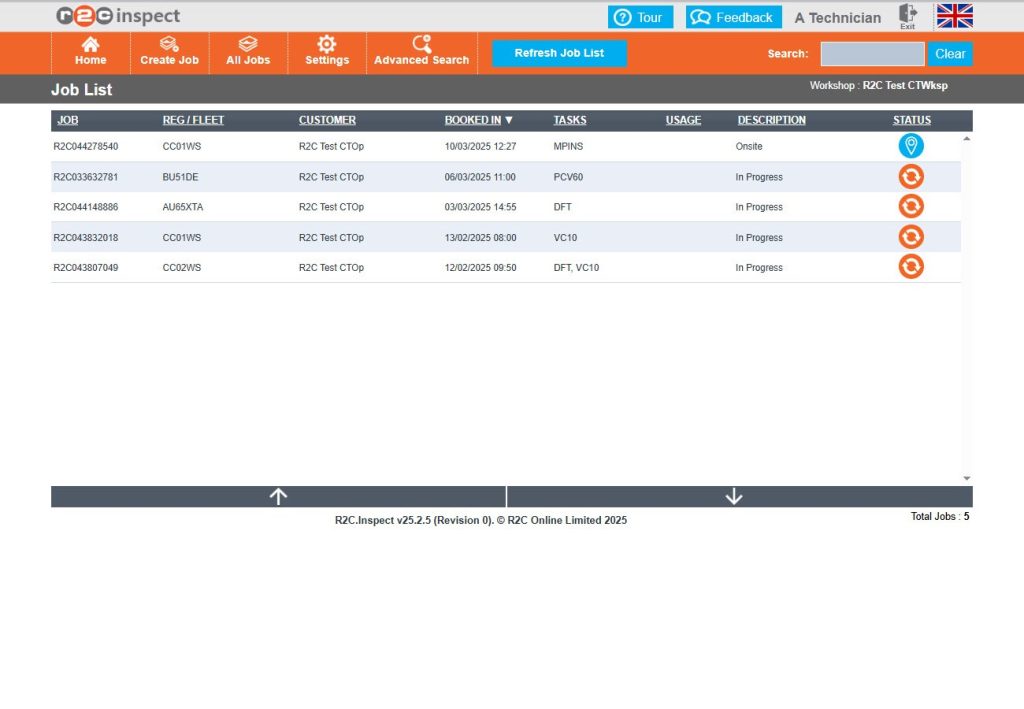
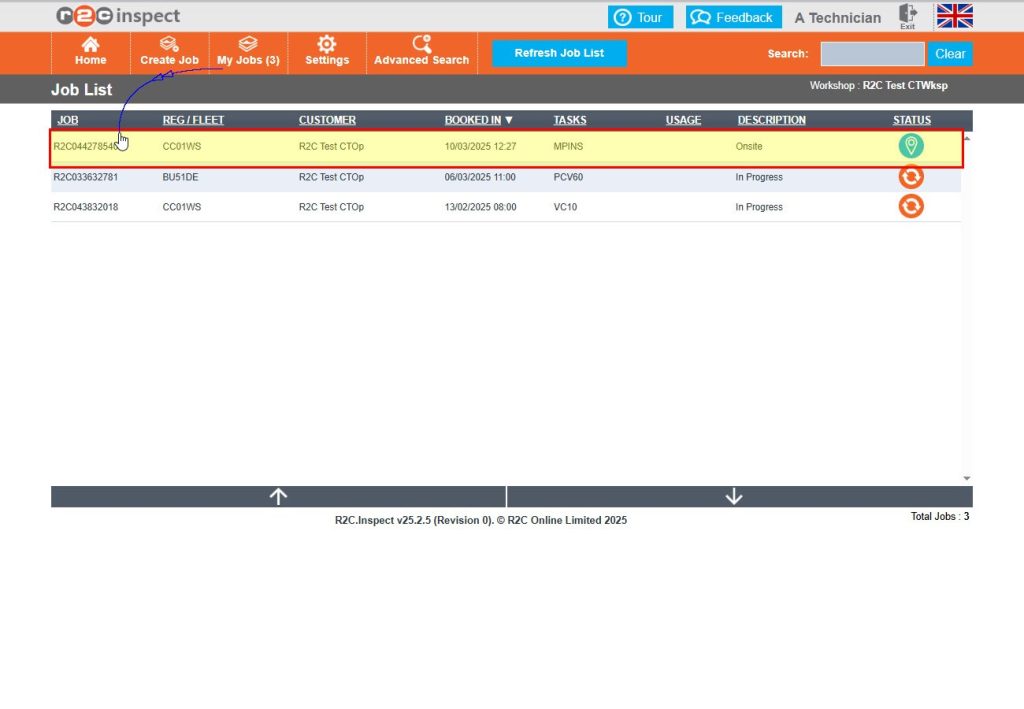
Step 11 - This homepage will contain all work waiting to be started, marked as Onsite, and all work In Progress.
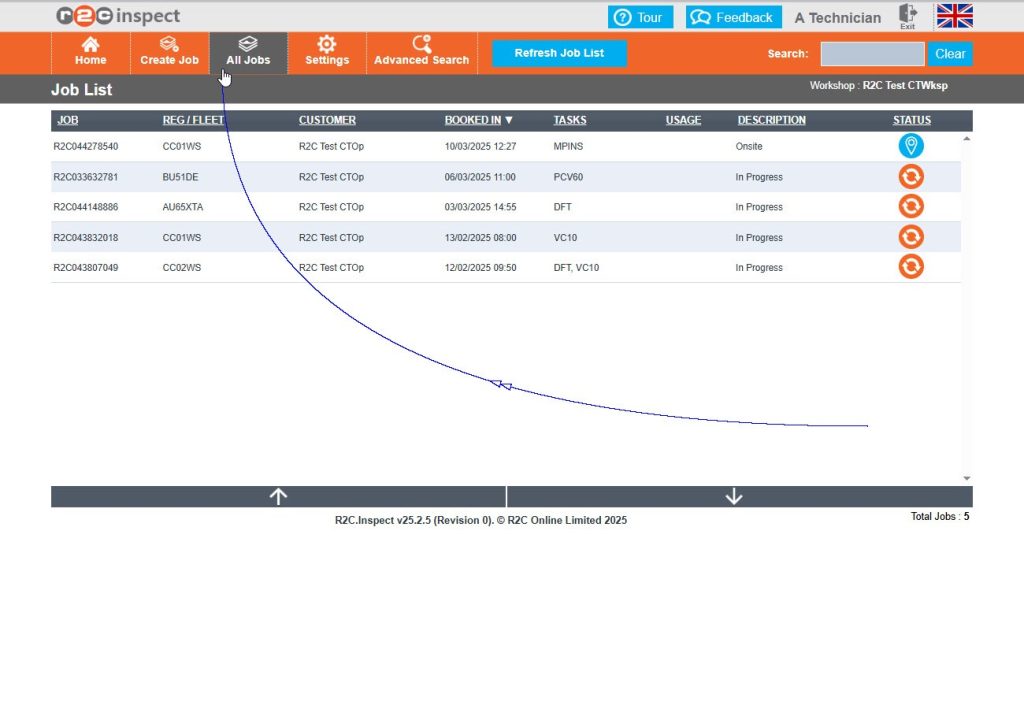
Step 12 – You can use the ‘My jobs’ link to filter to work assigned to you only. Should you need to pick up a task on another job you can return to the ‘All Jobs’ list in the same way.
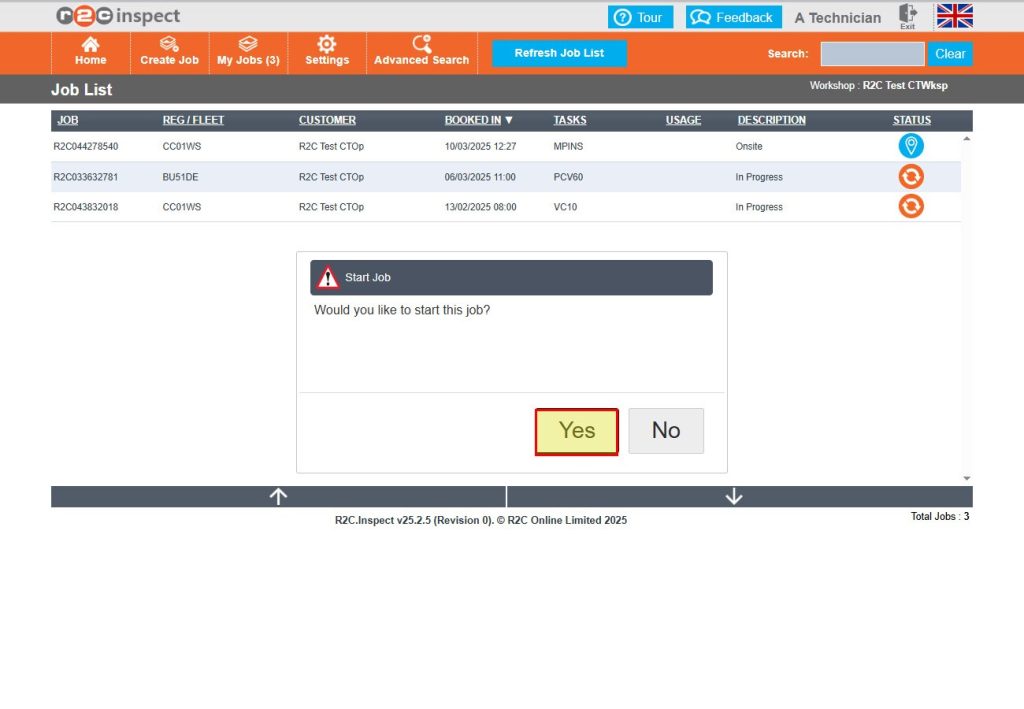
Step 13 – Click on an individual Jobsheet from the list to start the job.
Step 14 – By clicking Yes, the job is automatically marked as in Progress, and ready to be completed.
Technical Info & Self Help
How toremovean allocated item?
To remove an item simply click the item from the timeline and in the pop-up box click the REMOVE button.
How toreallocatework?
To reallocate work, you can use the above method to remove an item and then select this task/job from the list again to allocate to a different technician.
Alternatively, you can select a task and drag and drop the item to another technicians workload.
Why is my tasklocked?
If a task is locked, it may still be allocated to another technician. contact your Foreman or the admin team for assistance. The admin users can reallocate a task to you as needed.
A green outline on the account type icon signifies the guide is applicable whereas a red outline signifies it is not applicable to the the respective account type.